Blog

  • Why Your DCA Step Size 🛡️ Can Burn Every Order 🎯Before a Crash Finds Bottom 📉

    Why Your DCA Step Size 🛡️ Can Burn Every Order 🎯Before a Crash Finds Bottom 📉

    You pick your DCA step size in about ten seconds.

    Type a number, hit run, move on. Then a real crash shows up, and that tiny setting decides whether you’re buying the bottom or staring at an empty ladder.

    Most traders treat the step like a cosmetic choice.

    It isn’t.

    It controls how fast your orders get spent, and that matters more than most coin picks.

    Roughly three quarters of the tokens that hit price records last cycle have since dropped more than 60% from their peaks.

    Source: Blockworks

    Think about your last bad dip.

    Did your bot have ammo left when the price hit its lowest point?

    Let’s break this down.

    EXECUTIVE SUMMARY
    • The Problem: Traders set the DCA step by feel, then burn through every order early when a crash hits.
    • The Solution: Match the step to a realistic drawdown depth, then backtest it before going live.
    • The Incentive: You keep orders in reserve for the cheapest prices and stay in position for the bounce.
    • The Risk: A wider step can sit idle in choppy markets, and no setting guarantees profit. Not financial advice.

    What DCA Step Size Controls (and Why Most Traders Just Guess It)

    The step is the price gap between each DCA order.

    Price drops by that much, the bot buys again.

    Simple on paper, messy in a real crash.

    Real Backtest Example

    Strategy: DCA bot (3% step, 10 orders, 1.2× multiplier)
    Coin: DOGE/USDT
    Market Condition: A 34% decline over 60 days, driven by whale-led capitulation.
    Objective: Stay funded through a prolonged drop instead of exhausting the ladder early.
    Key Result: 13 of 14 sessions closed in profit, for +$924.23 in total. One session used all 10 orders, deployed $10,491 and still returned $298.54.
    Expert Interpretation: Step size and order count together set how much of a fall the ladder can absorb. A 3% spacing across 10 orders gave the bot enough depth to keep buying as price slid and still close the session in profit.

    DOGE Crashed 34% in 60 Days: Our DCA Bot Made +$924.23 Anyway

    Most traders never question it.

    They copy a number from a forum, or guess their DCA settings by whatever “feels” active.

    That’s a coin flip, not a plan.

    1. Step Size and Order Count: The Link Nobody Checks

    Picture a ladder.

    In any DCA strategy, max DCA orders are the rungs, and the step is the spacing between them.

    Pack the rungs close together and the whole ladder covers a short fall.

    Spread them out and it reaches much deeper.

    Swipe to view full data →
    Step Style How Fast Orders Get Used Reserve in a Deep Drop
    Tight Very fast Often empty
    Medium Steady Partly intact
    Wide Slow Mostly intact

    Here’s the part people miss.

    Your order count and your step work as a pair, and changing one without the other quietly changes how much of a drop you’re actually protected against.

    2. Why Tight Steps Feel Safe but Burn Your Orders

    A tight step buys all the time.

    Green dots everywhere, bot looks busy, and it feels like you’re defending your position.

    Look, I get it.

    Activity feels like control.

    Reality Check

    Strategy: DCA bot
    Coin: ETH/USDT
    Market Condition: An 18.5% decline over 45 days (January–February 2025) with no meaningful bounce.
    Common Belief: A DCA ladder works out as long as price eventually recovers.
    Key Result: 9 of 9 closed sessions finished in profit. One of them deployed the full $1,100 and returned $28.48 while ETH was still falling. One session stayed open at the end of the test.
    Expert Interpretation: Closed sessions only show the cycles that got their bounce. The open session shows what happens when the bounce is delayed: capital is fully deployed, the average entry sits well above the market, and the position has to wait. Reserve orders matter most in this scenario, and the step setting decides how much reserve is left.

    ETH Crashed 18.5% in 45 Days: Our DCA Bot Still Closed 9/10 Sessions Green

    But busy isn’t the same as protected.

    Every extra buy near the top is an order you won’t have near the bottom, and that’s where the cheap fills live.

    How a Tight DCA Step Gets Trapped in a Crash

    Crashes don’t politely drop a little and wait.

    They bleed, bounce, bleed again, and nuke through levels you thought were “deep enough.“

    A tight step treats the first stretch of that fall like the main event.

    By the time the real flush arrives, the ladder is finished.

    1. Orders Spent Early, Nothing Left at the Bottom

    Now imagine a trader watching price slide through a downtrend like the one in our DOT falling knife DCA test.

    The bot buys, buys, buys, and then goes quiet while the chart keeps falling.

    No ammo.

    Just a heavy bag and a lot of copium.

    In one study of freshly listed tokens, the worst drawdown showed up within roughly five to thirty-two days.

    Source: Presto Research

    Deep drops can also arrive fast, which leaves little time to react by hand.

    2. Why a Sharp Recovery Doesn’t Always Rescue You

    So the bounce comes. Great, right?

    Wait, not so fast.

    A position built mostly near the top has a high average cost, and the price needs to climb a long way before the bot can close anything in profit.

    CEO Note:

    Crypto isn’t a fair game, and the market doesn’t care how busy your bot looks. I’d rather see a trader survive a bad drop with orders left than feel active and end up rekt. Verify first. Risk later. Scale slowly. – Zaheer

    Meanwhile, a position that kept reserve for the lows has a cheaper average and a shorter road back, as these DCA bot backtest case studies show.

    Same coin, same crash, very different outcome.

    Wide DCA Step Size Trade-Offs: Survival vs Activity

    Wider spacing isn’t a free lunch.

    It keeps your ladder alive in a deep drop, but it changes how the bot behaves day to day.

    You’re trading activity for staying power.

    Think of it like a fuel tank on a long trip.

    A bigger tank means the needle barely moves early on, and that’s the whole point.

    1. Fewer Buys, More Reserve Capital

    With a wide step, the bot waits.

    Price has to fall further before the next order fires, so fewer orders get used in the early part of a drop.

    More ammo sits untouched for the lows.

    CG STRATEGY ANALYZER

    Confused about
    market outlook?

    Trading without a plan is just gambling. Our strategy architect analyzes your risk tolerance and capital to match you with a proven algorithmic framework.

    PASSIVE DCA Bot
    AGGRESSIVE Grid Pro
    BALANCED Rebalance

    That’s survival logic.

    The cheapest prices usually show up late and fast, and a trader with orders left gets to use them.

    A wide step protects you, well, mostly.

    If price falls past the end of your ladder, you’re still stuck waiting, just later and with a lower average.

    2. What You Give Up in Choppy, Sideways Markets

    In chop, a wide step can feel dead.

    Price wiggles inside a small range, never travels far enough to trigger a buy, and the bot just sits there.

    No fills. No action.

    Swipe to view full data →
    Market Type Tight Step Wide Step
    Deep crash Orders run out early Reserve lasts longer
    Sideways chop More frequent fills Often idle
    Sharp rebound Heavy, late-built bag Lower average entry

    Honestly, that boredom is where traders start tweaking settings at the worst possible time.

    Every strategy has trade-offs, and this is the main one here.

    CG STRATEGY ANALYZER

    Confused about
    market outlook?

    Trading without a plan is just gambling. Our strategy architect analyzes your risk tolerance and capital to match you with a proven algorithmic framework.

    PASSIVE DCA Bot
    AGGRESSIVE Grid Pro
    BALANCED Rebalance

    Neither style wins everywhere.

    The right pick depends on how deep the drop can go.

    How to Match Your DCA Step Size to Expected Drawdown Depth

    The goal is simple.

    Make your whole ladder cover a drop that’s realistically possible, not one that’s comfortable to imagine.

    So ask what this coin has done before, then build for that.

    1. Reading Past Drawdowns Before You Set the Step

    Pull up the chart and zoom way out.

    Look at the deepest falls from past tops. Alts tend to fall harder than people remember, because memory is kind to bagholders.

    In one large study of liquid tokens, the median token lost 97% from its qualifying price.
    Source: Blockworks Research

    Use that as a gut check.

    Multiply your step by your max orders and see where the ladder actually ends.

    And if it ends way above where price has bottomed before?

    Well.

    2. Backtest Three Step Sizes Before Going Live

    Change only the step. Keep the base order, DCA order, max orders, and take profit the same.

    Run a tight, a medium, and a wide version through the same crash window in the CryptoGates DCA Backtest Bot, then compare how many orders each one still had at the lows.

    That takes five minutes, maybe ten.

    DCA Step Strategy Audit

    • Does my full ladder reach a drop this coin has actually seen before?
    • Did I change only the step between test runs?
    • How many orders were left when price hit its lowest point?
    • Can my wallet handle the max capital if every order fills?
    • Am I okay with a bot that sits idle in chop?

    Let the data do the talking. Trust the numbers, not the vibes.

    Set the Step for the Drop, Not the Comfort

    Your DCA step size decides how long your capital lasts when the market turns ugly. Tight steps feel active and safe, but they tend to spend every order early.

    Wider steps keep ammo for the lows, though they can sit quiet in chop.

    So build the ladder around a drop that’s realistic, not one that’s comfortable, and let a DCA strategy backtest show you the difference before real money is on the line.

    HISTORICAL DATA AUDIT

    Battle-Test Your Strategy
    Before the Market Does.

    Eliminate guesswork with institutional-grade backtesting for DCA, Grid, and Rebalance bots. Real historical data. Real-world results.

    EST. OPTIMIZATION +42% ROI Efficiency
    Start Backtest Now

    Sourced from 5+ Years of Exchange Data

    If you want to see this play out on real crash data, the full figures live in our ARB DCA Step Playbook.

    Then run your own parameters in the CryptoGates DCA Backtest Bot and see what the data shows.

    No signup. No credit card. Just build → cryptogates.iO

    Not financial advice.

    FAQs

    How do I choose the right DCA step size for my capital?

    Start with how deep the coin has fallen in the past, then pick a step so your full ladder reaches that depth. Backtest a few options before you go live.

    Enough that step times orders covers a realistic worst-case drop, without needing more capital than you’re willing to commit. Test a few combos together, since they work as a pair.


    Yes. A good step improves survival, but price can fall past your ladder, and a position can stay underwater for a long time. No setting removes risk.
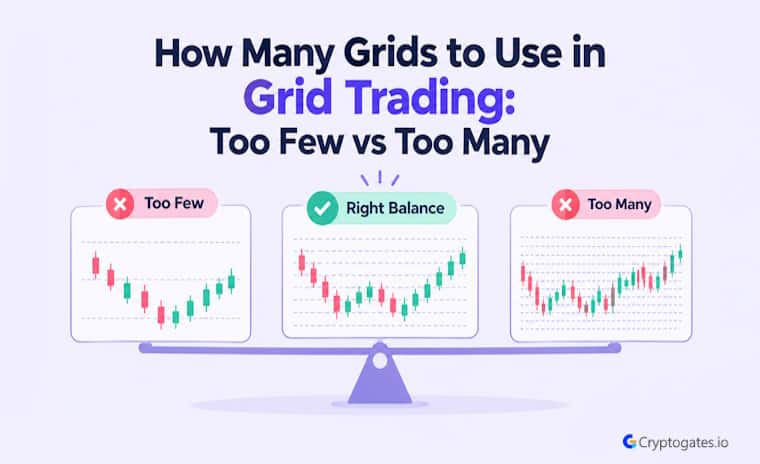

     

  • Perfect Range 📏, Weak Results? How Many Grids 📊 to Use in Grid Trading 🎯

    Perfect Range 📏, Weak Results? How Many Grids 📊 to Use in Grid Trading 🎯

    You spent an hour finding the perfect range.

    Support looks clean, resistance keeps rejecting price, and the chart screams chop.

    Then you type a number into the grids box, hit run, and honestly, that one number ends up mattering more than the range did.

    Nearly 9 in 10 individual derivatives traders ended a full year in the red in a large regulator study.

    Source: SEBI

    Most traders never stop to ask how many grids to use in grid trading.

    They copy whatever a fren posted on CT, or they leave the default and hope. That’s a coin flip dressed up as a strategy.

    Same range.Same coin. Same capital.

    Change only the grid count, and the results can look like they came from two different bots.

    EXECUTIVE SUMMARY
    • The Problem: Most grid bot users pick a grid count by guesswork, so a solid range still gives weak or fee-heavy results.
    • The Solution: Treat grid density as one testable lever and compare a few values side by side.
    • The Incentive: You find the balance between fill frequency and fees before real money is on the line.
    • The Risk: Backtests use past data, so a count that fit one range can misfire when volatility shifts.

    How Many Grids to Use in Grid Trading: What Grid Density Really Controls

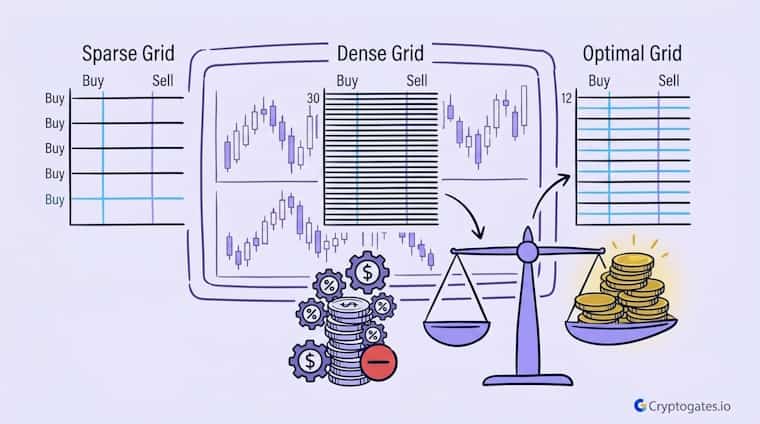
    Grid density is just how many buy and sell levels your grid bot places inside your range.

    Squeeze more levels in, and each step gets smaller.

    Spread fewer levels, and each step gets wider.

    Swipe to view full data →
    Grid Count Spacing Between Levels Order Size Per Level
    Fewer grids Wider Larger
    Moderate grids Balanced Balanced
    Many grids Tighter Smaller

    Sounds simple.

    It isn’t, because that one choice changes trade frequency, order size, and fee impact all at once.

    1. Grid Count vs. Grid Spacing

    Think of it like a staircase.

    Fewer steps mean each one is tall.

    More steps means lots of little ones.

    Your bot earns when the price walks up or down those steps, so step size decides how much movement counts as a trade.

    Small wiggles trigger fills on a tight grid and slip right past a wide one.

    Real Backtest Example

    Strategy: Grid bot, three grid counts tested side by side
    Coin: NEAR/USDT
    Market Condition: 45-day window, same range and capital for every variant
    Objective: Isolate grid count as the only variable: 20 vs. 45 vs. 80 grids.
    Key Result: The 45-grid setup returned +17.18% ROI and was the only variant to beat buy & hold. Both the sparse 20-grid and dense 80-grid versions trailed it.
    Expert Interpretation: Neither extreme won. The sparse grid left fills on the table, and the dense grid gave the edge back somewhere between thinner orders and fees. The middle setting captured enough cycles without over-slicing capital, which is why grid count is worth testing rather than guessing.

    20 Grids, 45 Grids, 80 Grids: Only One Beat Buy & Hold on NEAR

    Here’s the part beginners miss.

    Your capital gets sliced across every level, so tighter spacing also means smaller orders.

    More action, thinner slices.

    2. Why Sideways Markets Put Density in the Spotlight

    In a strong trend, grids get run over.

    Price leaves the range, the bot stops doing its job, and you’re a bagholder waiting for a comeback.

    Sideways action is different.

    Price keeps tagging the same zones, which is exactly what a grid feeds on, since grid trading is designed for prices that fluctuate within a specific range.

    SYSTEM ACCESS: CG4.2

    Stop Guessing.
    Stress Test Your Edge.

    The market doesn’t care about your backtest. Our engine simulates 1,000+ “what-if” scenarios to ensure your strategy is built for survival.

    Run Crypto Strategy Engine →
    ROBUSTNESS SCORE
    75+ STRUCTURAL EDGE
    RISK OF RUIN < 1%
    TARGET HIT 92%

    So in chop, density decides how much of that back and forth you actually capture.

    Set it too sparse and price can wiggle right through a whole… well, you get the idea.

    Set it too tight, and you’re trading noise.

    Fair enough, but which mistake costs more?

    Let’s break that down next.

    Too Few Grids: Missed Fills and Idle Capital

    A sparse grid feels calm. Few orders, few trades, not much to watch.

    Interactive Checklist

    • Price swings back and forth many times without filling a single order
    • Long stretches pass with no trades at all
    • Each fill pays well, but fills show up rarely
    • Most of your capital sits in cash, waiting for a level to get hit
    • Your bot lags plain holding even though the range stayed intact

    But calm can also mean your money is just sitting there while price does laps around it.

    1. Wide Spacing, Fewer Trades, Slower Compounding

    Here’s the interesting part.

    Each fill on a wide grid usually earns more, and that feels great.

    But price has to travel farther to trigger the next order, so smaller swings just pass right through.

    Look at a choppy range, and you’ll see price loop through the same zone a dozen times while a sparse grid sits there doing nothing.

    Research Insight

    Grid bots earn from repetition, and repetition needs a market that keeps revisiting the same zones. Our SUI test showed this clearly.

    Strategy: Grid bot
    Coin: SUI/USDT
    Market Condition: 38 days of volatile chop, with two full crash-and-recover cycles
    Objective: See how much back-and-forth movement a grid can capture when price ends the window almost where it started.
    Key Result: SUI fell about 7.1%, yet the bot fired 1,759 trades and closed at +7.46% ROI. That beat buy & hold by $861.59.
    Expert Interpretation: The range did the heavy lifting. Price kept crossing the same levels, and the grid harvested each pass. Density only pays when the market gives it swings to capture.

    SUI Fell 7% in 38 Days: Our Grid Bot Fired 1,759 Trades and Banked +7.46%

    Fewer grids mean fewer trades.

    Well, usually.

    It depends on how choppy the range is. Either way, compounding needs repeated cycles, and fewer cycles tend to mean slower growth.

    Total profit can end up lower than a denser setup even when every single trade looked healthy.

    2. When a Sparse Grid Still Makes Sense

    A smaller account can run into minimum order sizes, and a denser grid may not even be possible.

    Higher fee tiers change the math too.

    On a calm pair with slow swings, extra levels might never get touched anyway.

    How many grids is best for a grid trading bot?

    There’s no single best number. It depends on your range width, volatility, capital, and fees, so test a few grid counts side by side and compare the balance between profit and trading cost.

    Sparse also means less to babysit, which suits anyone who’d rather touch grass than stare at charts.

    It’s not the villain.

    It’s a trade-off, and you should pick it on purpose.

    Too Many Grids: Fee Drag and Noise Trading

    Dense grids feel productive.

    Trades pile up, the log scrolls forever, and it looks like the bot is printing.

    Sound familiar?

    The most active traders in a landmark study earned about 6.5 points less per year than the market, and the gap came from costs and poor timing.

    Source: Barber and Odean, Journal of Finance

    But activity isn’t the same as edge.

    1. Tiny Orders and Thin Profit per Level

    Your capital gets sliced into many small pieces.

    Each order is small, and each profit per level is small too.

    Fees then take a bite out of both sides of every round trip.

    When the profit per level is thin, a fee that looks harmless starts eating a big share of it.

    CG STRATEGY ANALYZER

    Confused about
    market outlook?

    Trading without a plan is just gambling. Our strategy architect analyzes your risk tolerance and capital to match you with a proven algorithmic framework.

    PASSIVE DCA Bot
    AGGRESSIVE Grid Pro
    BALANCED Rebalance

    Honestly, this is the part people skip.

    Trade count goes up while net gain per trade goes down.

    Degen energy, just with a spreadsheet.

    2. Fees and Slippage on Choppy Candles

    Choppy candles trigger a dense grid over and over.

    Every fill pays a fee, and fast moves can fill at slightly worse prices than planned.

    Small leaks, sure.

    But they add up like a subscription you forgot to cancel.

    CEO Note:

    Every strategy deserves proof before it deserves capital. I’ve watched too many people copy a setting and pay tuition to the market. Test first. Scale slowly. Let the data do the talking.

    Some of those trades are pure noise, price twitching between two levels for no reason.

    Chasing every twitch is FOMO with a bot’s face on.

    More trades can easily end in a weaker result than a calmer grid.

    How to Find Your Grid Count Before Risking Capital

    So where’s the sweet spot?

    It moves.

    It shifts with the pair, the range, and your fees, which is why copying a setting rarely works.

    1. Match Density to Volatility and Range Width

    A wide range on a jumpy coin can carry more levels than you’d think, because the swings are big enough to clear fees.

    A tight range on a quiet pair usually can’t.

    The simple check: each step should cover fees and still leave a real profit.

    If it doesn’t, the grid is too tight for that market.

    2. Run a Simple A/B/C Backtest, Change Only One Setting

    Pick a range.

    Lock fees, capital, and grid logic.

    Now change only the grid count across three tests: sparse, middle, and dense.

    Do more grids always mean more profit in grid trading?

    No. More grids means more trades, but fees and thinner orders can eat the extra gains. Past a certain point, added density tends to add cost, not edge.

    The Grid Backtest Bot at CryptoGates runs all three on real one-minute candles, so you can compare them side by side with no sign-up.

    Then read past the headline return and look at trade count, fees paid, and drawdown.

    Grid Density Is a Trade-Off, Not a Setting to Max Out

    Too few grids miss fills.

    Too many bleed to fees and noise.

    Working out how many grids to use in grid trading comes down to balancing those two, and the right grid count for a grid bot shifts with every pair and range.

    Guessing won’t find it.

    Testing will.

    This isn’t financial advice, just a process worth following.

    HISTORICAL DATA AUDIT

    Battle-Test Your Strategy
    Before the Market Does.

    Eliminate guesswork with institutional-grade backtesting for DCA, Grid, and Rebalance bots. Real historical data. Real-world results.

    EST. OPTIMIZATION +42% ROI Efficiency
    Start Backtest Now

    Sourced from 5+ Years of Exchange Data

    Run your own parameters and see what the data shows in the Grid Backtest Bot.

    Want to see a full A/B/C test on a real coin?

    The Grid Strategy Playbooks in Strategy Lab break one down.

    FAQs

    What is a grid trading bot and how does it make money?

    It places buy and sell orders at set levels inside a price range. It earns small profits each time price moves between levels and completes a buy and sell pair.


    Higher fees widen the gap each level must cover, so they usually push the ideal grid count lower. Make sure every step clears fees with real profit left over.


    Most platforms need you to stop the bot and restart with new settings. Backtest first, so you’re not adjusting with live money.


  • Your DCA Take Profit Percentage 🎯 Might Be Costing You 💸 The Best Part Of The Bounce 📈

    Your DCA Take Profit Percentage 🎯 Might Be Costing You 💸 The Best Part Of The Bounce 📈

    Ser, you set your take profit at 5% once, felt good about it, and never looked back.

    Fair enough. But here’s the thing.

    Your dollar-cost averaging (DCA) take-profit percentage is quietly deciding a lot more than “when the bot sells.”

    It’s deciding how much of a bounce you actually keep versus how much you leave sitting on the table, waiting for a candle that might not come back around.

    83.53% of crypto investors have used dollar-cost averaging at some point, and 59% run it as their main strategy.

    Source: Kraken Investor Survey

    Most beginners treat TP% like a formality.

    It’s not.

    It’s one of the few levers you fully control in a market that controls everything else.

    EXECUTIVE SUMMARY
    • The Problem: Traders set a DCA take profit percentage once, then never test whether it actually fits the market condition they’re trading in.
    • The Solution: Treat TP% as a variable you test against different regimes, not a fixed setting you install and forget.
    • The Incentive: A TP% that matches the current regime can mean the difference between banking a solid win and watching a good entry turn into a mediocre one.
    • The Risk: A wider TP% can look great in a fast bounce but give back the same gains if the market stalls or reverses before hitting target.

    What Take Profit Percentage Actually Controls In A DCA Bot

    Let’s get one thing straight.

    Your DCA take-profit percentage doesn’t decide if your strategy works.

    It decides when a single session closes and how much profit gets locked in before the bot resets and waits for the next dip — the same mechanic that let our BTC DCA bot backtest hit take-profit ten times in a single stretch.

    That’s it.

    CEO Note:

    “Verify first. Risk later. Scale slowly. Your TP% should reflect what the backtest actually shows for the market condition you’re testing, not a number that felt right last week.”

    Nothing more, nothing less.

    But that “nothing more” ends up mattering a whole lot when the price keeps moving after your bot has already exited.

    Why A Small Number Has An Outsized Effect

    Here’s what most guides miss.

    A 2% TP and a 5% TP don’t just change your profit target.

    They change how often your sessions close, how much capital gets freed up for the next entry, and how exposed you stay to a reversal – the same kind of outsized effect a DCA bot’s step percentage setting has on entries.

    Does a lower take profit percentage mean safer trading?

    Not exactly. A lower TP% tends to close sessions faster and more often, which can reduce exposure time. It doesn’t reduce risk on any single trade, just how long you’re sitting in it.

    Small percentage, big downstream effect.

    That’s the part beginners skip past.

    Tight TP% vs Wide TP%: The Real Tradeoff

    Look, there’s no universally “correct” TP%. There’s only the one that fits what the market is doing right now.

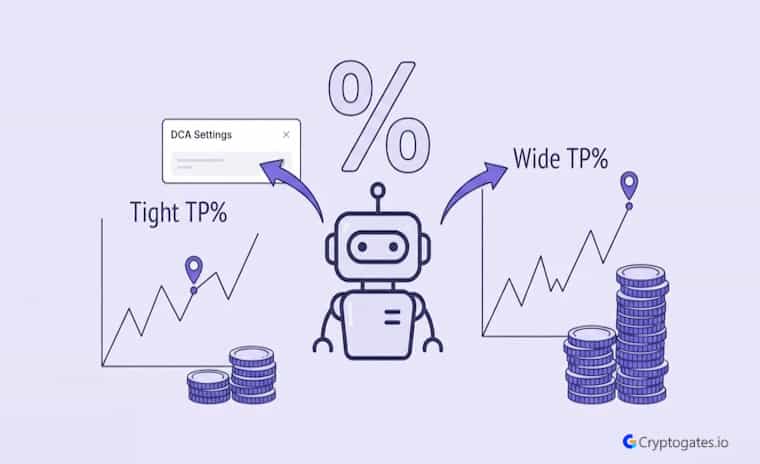
    A tight TP% grabs small wins fast and often.

    Research Insight

    Traders often treat a percentage-point tweak to a bot setting as a rounding error – not something worth testing carefully. CryptoGates internal backtesting suggests the opposite: the number itself doesn’t need to be dramatic for the downstream result to shift meaningfully.

    Strategy: DCA
    Coin: TRX/USDT
    Market Condition: 105-day post-ATH slow-bleed correction, no clean bounce
    Objective: Compare step-multiplier variants under identical entry logic
    Key Result: A 1.15× multiplier variant outperformed the next-best variant tested by $192 – the single largest gap recorded among the settings run, inside a session set that closed 27 of 28 sessions in profit overall.
    Expert Interpretation: The multiplier here isn’t the take-profit percentage, but the lesson carries over directly – a setting that reads like a footnote on paper can be the actual gap between an average outcome and the best one on the table.

    TRX DCA Bot Backtest: 888 Profit in a Slow-Bleed Market

    A wide TP% asks the price to keep moving in your favor before it lets go.

    Neither is wrong.

    They just behave completely differently depending on the setup you’re in.

    1. What Happens During A Fast Recovery Leg

    Picture this.

    Price crashes hard, panic spreads across CT, then things start easing, and the chart begins climbing back.

    In that kind of V-shaped bounce, a tighter TP% tends to close sessions early, sometimes right as the real move is getting started.

    Real Backtest Example

    Strategy: DCA
    Coin: ETH/USDT
    Market Condition: 45-day, 18.5% decline (Jan–Feb 2025 bear leg)
    Objective: Observe how a fixed take-profit threshold performs as sessions close versus staying open
    Key Result: 9 of 9 closed sessions finished in profit – including one that deployed the full $1,100 and returned $28.48 while ETH was actively falling. The session still open at the end of the test window tells the sharper story: with no bounce back to the TP level, that capital simply sat exposed.
    Expert Interpretation: This is the regime dependency the take-profit setting can’t escape – a TP% that performs cleanly through a bounce-heavy stretch can leave a position stranded the moment price stops bouncing at all.

    ETH DCA Bot Backtest: January-February 2025 Bear Market Results

    A wider TP% gives the recovery room to actually develop before the bot books profit.

    During a genuine bounce, patience on TP% often pays for itself.

    Often. Not always.

    2. What Happens During A Choppy Or Slow Grind

    Now flip the market condition.

    In a range-bound, directionless chop, a wider TP% can sit there for a long time, waiting for a move that never fully commits.

    Swipe to view full data →
    Market Condition Tight TP% Wide TP%
    Fast recovery (V-shape) Exits early, smaller win Captures more of the bounce
    Choppy / sideways Closes sessions faster, cycles capital Sits waiting, can stall
    Strong reversal risk Locks in profit sooner Risk giving back gains

    A tighter TP%, in that same environment, tends to close sessions more frequently and keep capital cycling instead of parked.

    Same bot. Same DCA logic.

    Completely different outcome, just because the regime changed underneath it.

    Should I use the same take profit percentage for every market condition?

    Not really. What works in a fast recovery often underperforms in a choppy range, and vice versa. Testing TP% against the actual regime beats picking one number and reusing it everywhere.

    Here’s the honestly annoying truth about this: the “right” TP% for a fast recovery can be the wrong TP% for a slow grind, and the market doesn’t announce which one you’re in.

    Finding Your TP% Without Guessing

    At the end of the day, your DCA take-profit percentage isn’t a set-it-and-forget-it number.

    It’s a variable that behaves differently depending on whether the market is bouncing hard or grinding sideways, and the only real way to know which setting fits your pair right now is to test it rather than guess it.

    HISTORICAL DATA AUDIT

    Battle-Test Your Strategy
    Before the Market Does.

    Eliminate guesswork with institutional-grade backtesting for DCA, Grid, and Rebalance bots. Real historical data. Real-world results.

    EST. OPTIMIZATION +42% ROI Efficiency
    Start Backtest Now

    Sourced from 5+ Years of Exchange Data

    Run your own parameters through the DCA Strategy Backtest Bot and see how tight versus wide TP% actually plays out on real historical data before you risk capital on a hunch.

    FAQs

    What take profit percentage should I use for a DCA bot?

    There’s no fixed number that works everywhere. It depends on whether you’re trading a fast recovery or a slow, range-bound market, so testing both against your pair is the safer approach.


    Not always. A wider TP% can capture more of a strong move, but it also risks giving back gains if the market reverses before hitting the target.


    Whenever the market regime shifts. A setting built for a bounce won’t necessarily hold up once the market turns choppy or starts trending the other way.


  • Bitcoin 💰 Price Outlook: The Dip 📉 That Never Came Needs Proof 🔐

    Bitcoin 💰 Price Outlook: The Dip 📉 That Never Came Needs Proof 🔐

    Analysts called for a deep Bitcoin drop this autumn.

    It never came.

    The price is back near 84K instead, and anyone waiting for that dip watched the recovery from the sidelines.

    Bitcoin rose about 29% in 35 days, from around $62,900 to over $81,000

    (Source: Galaxy Research, via The Crypto Basic)

    Here’s the Bitcoin price outlook and why a plan beats a prediction.

    EXECUTIVE SUMMARY
    • The Problem: Traders waited for a predicted dip that never arrived.
    • The Solution: Map scenarios instead of betting on one price.
    • The Incentive: You stay ready whether price rises, stalls or falls.
    • The Risk: One strong quarter doesn’t prove the rally survives stress.

    The Bottom That Never Showed Up

    Several forecasts pointed to a deep drop, roughly half of where the price trades now.

    Price never touched that zone.

    The recovery started months earlier.

    CEO Note:

    Predictions expire. A tested process doesn’t. I’d rather you know your plan before the market moves than chase a call after it.

    Honestly, that wasn’t a near miss.

    Actually, it was a wide miss, and it cost patient buyers real gains.

    Can anyone predict the exact bottom in Bitcoin?

    No. Exact price and date calls carry high uncertainty, so scenario mapping works better.

    Look, forecasting isn’t the problem.

    Betting your whole plan on one price and one date is.

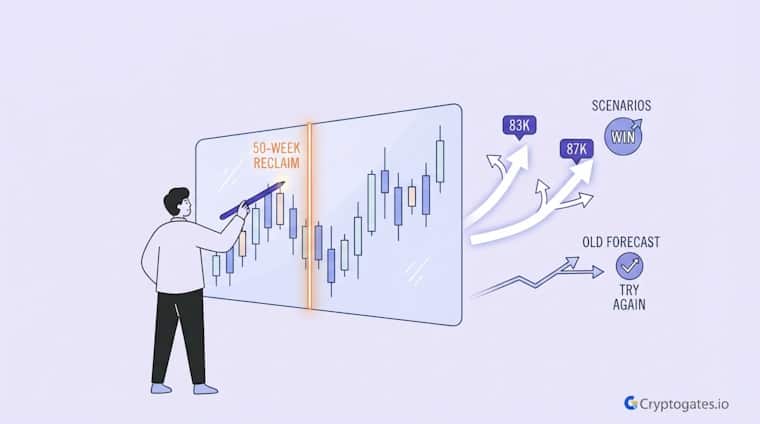
    Bitcoin Price Outlook: Does the 50-Week Reclaim Hold?

    Price sits at 84,298, above the 50-week moving average at 78,174.

    The weekly candle is still open.

    Swipe to view full data →
    Scenario What happens What it suggests
    Close above 83K Move toward 87K Reclaim gains weight
    Test of 87K Rejection or breakout Needs a hold
    Close under 50W average Slide back Likely a squeeze
    75K support holds Buyers defend Range stays intact

    Here’s the thing.

    A reclaim isn’t a confirmation.

    A weekly close above 83K strengthens the case for 87K. A slide back under the average hints at a squeeze into resistance.

    CG STRATEGY ANALYZER

    Confused about
    market outlook?

    Trading without a plan is just gambling. Our strategy architect analyzes your risk tolerance and capital to match you with a proven algorithmic framework.

    PASSIVE DCA Bot
    AGGRESSIVE Grid Pro
    BALANCED Rebalance

    Before sizing any trade on these levels, run both scenarios through the CryptoGates backtester. It’s free, and it shows how your plan behaves before real money is on the line.

    Crypto Is Leading, But Calm Markets Prove Little

    Crypto beat gold, stocks, and semiconductors this quarter.

    Wait, that sounds bullish, so let’s slow down.

    Interactive Checklist

    • Did the weekly close hold above 83K?
    • Is 87K rejected or reclaimed?
    • Are funding and open interest rising too fast?
    • Is my plan tested before I size up?

    Strength in a calm stretch says little about stress, so watch funding rates and open interest.

    What to Watch Next

    The predicted dip never came, the reclaim isn’t confirmed, and stress hasn’t tested the rally yet.

    Test your scenarios in the CryptoGates backtester before you size up.

    HISTORICAL DATA AUDIT

    Battle-Test Your Strategy
    Before the Market Does.

    Eliminate guesswork with institutional-grade backtesting for DCA, Grid, and Rebalance bots. Real historical data. Real-world results.

    EST. OPTIMIZATION +42% ROI Efficiency
    Start Backtest Now

    Sourced from 5+ Years of Exchange Data

    FAQs

    Was the predicted Bitcoin bottom wrong, or just early?

    It never arrived, and the recovery began months earlier. Timing an exact bottom is unreliable.


    It would suggest the reclaim was a squeeze into resistance. Support near 75K becomes the level to watch.


  • The One Setting 🎯 That Makes or Breaks Volatile 🔄 Altcoin Rebalancing Bots ⚖️

    The One Setting 🎯 That Makes or Breaks Volatile 🔄 Altcoin Rebalancing Bots ⚖️

    Ever paired a stable-ish blue chip with a coin riding a hot narrative, then watched your rebalance bot fumble the exit timing?

    That’s basically what happened with AAVE and ONDO.

    One asset chopped sideways for months.

    The other broke out hard on the RWA narrative.

    And the only thing standing between solid gains and leaving money on the table was one number: the coin ratio trigger.

    The tokenized real-world asset sector jumped more than 260% in a single stretch, crossing the $23 billion mark.

    Source: Cointelegraph (Binance Research)

    This is exactly why testing a crypto rebalancing strategy for volatile altcoins matters more than picking the “right” coins, ser.

    The coins aren’t the real variable here.

    The trigger is.

    EXECUTIVE SUMMARY
    • The Problem: A “safe” stable-plus-breakout pair still bleeds if the trigger setting is wrong.
    • The Solution: Testing AAVE/ONDO at 1%, 2%, and 5% triggers shows how trigger width trades fees for trend capture.
    • The Incentive: The loosest trigger delivered the highest return using a tenth of the trades.
    • The Risk: Too loose a trigger can mean rebalancing late if the trend suddenly reverses.

    Why AAVE and ONDO Make a Perfect Divergence Test

    Look, most rebalance backtests use two coins that move together, unlike our BTC/ETH divergence autopsy.

    That’s kind of pointless if you’re trying to learn something.

    This one’s different.

    AAVE spent the test window basically going nowhere in a wide range, while ONDO caught a real narrative wave and broke out hard.

    Swipe to view full data →
    Asset Role in Test Price Behavior
    AAVE Ballast (stability anchor) Range-bound, chopped between roughly 135 and 250
    ONDO Breakout leg (RWA narrative) Climbed steadily off a low base before fading late
    Portfolio 50/50 starting split Rebalanced automatically as the gap between the two widened

    That gap between a “ballast” asset and a “runner” asset is exactly what makes a crypto rebalancing strategy for volatile altcoins worth studying in the first place, because it forces the bot to make real decisions instead of just following two correlated charts up and down together.

    1. What “Ballast” Means in a Rebalance Portfolio

    Think of AAVE here like ballast in a ship.

    It doesn’t do much on its own, but it keeps the whole thing from tipping over when ONDO starts moving fast.

    Real Backtest Example

    The AAVE/ONDO test isn’t the only divergence pair in CryptoGates’ internal research.

    A separate backtest ran ETH against XRP over four months, where ETH quietly compounded a 14% gain while XRP essentially went nowhere. The setup mirrors the ballast-versus-runner structure above, just with the roles reversed: XRP played the flat anchor, ETH did the climbing.

    The rebalance bot didn’t need to predict which asset would move. It only needed a trigger wide enough to let ETH’s gain build before locking part of it into the flat leg. That test closed ahead of passive holding by capturing the value of the gap between the two assets — the same mechanic driving the AAVE/ONDO result above, just on a different pair and timeframe.

    The consistency across pairs suggests trigger sizing, not coin selection, is the transferable lesson.

    ETH Rose 14% While XRP Sat Flat →

    Every time ONDO’s value pulled ahead of the 50/50 split, the bot sold a slice of it and topped up AAVE, locking in gains along the way instead of hoping the breakout lasts forever.

    2. The Single Variable Being Tested

    Everything else in this test stayed frozen. Same pair, same 3,500 USDT starting size, same Binance fee, same time window.

    What is a coin ratio trigger in a rebalancing bot?

    It’s the percentage a coin’s weight has to drift from its target allocation before the bot automatically buys or sells to bring it back in line. A tighter percentage means more frequent, smaller rebalances.

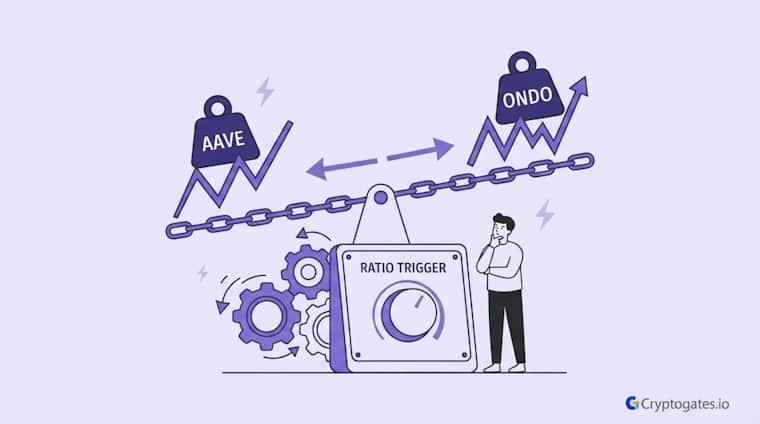
    The only thing that changed across the three runs was the Coin Ratio Trigger, set at 1%, 2%, and 5%.

    That’s it.

    One dial, three positions.

    What Tightening or Loosening the Trigger Actually Does

    Here’s the interesting part.

    All three tests used the exact same coins, same 3,500 USDT, same fee structure.

    The only dial that moved was the Coin Ratio Trigger, and it dragged everything else along with it, trade count, fee drag, and final return.

    Shorter rebalancing intervals don’t add a meaningful bonus to returns, but they do stack up fees fast, with daily rebalancing on a similar-sized portfolio eating close to 4.5% in trading costs alone.

    Source: HackerNoon (Sia)

    Test A ran a 1% trigger and fired 50 rebalances.

    Test B ran a 2% trigger and fired 17.

    Test C, the loosest at 5%, only fired 5 times.

    And here’s the part that trips people up: more trades didn’t buy more profit. It bought more fee drag, plain and simple.

    1. Test A vs Test B vs Test C — Reading the Trade-Off

    Test A closed at a 48.68% ROI with 1,703.87 USDT in profit.

    Test B landed at 49.06% ROI with 1,717.06 USDT.

    Test C, running the loosest trigger, closed at 49.60% ROI and 1,735.85 USDT, using just 5 trades to get there.

    Interactive Checklist

    • Is one of your assets range-bound and the other trending hard, or are they moving together?
    • Can your exchange fee tier absorb frequent small rebalances without eating your edge?
    • Are you optimizing for hands-off automation or for tight risk control?
    • Have you run the same pair through the Rebalance Strategy Backtest Bot at more than one trigger width?
    • Does your risk tolerance actually match a looser trigger, or does that make you nervous?

    Same starting capital. Same coins.

    Different outcome purely because of trigger width.

    Research Insight

    It’s tempting to assume a tighter trigger is always the “safer” or more responsive choice. Another internal test challenges that assumption. When XRP surged 44.6% over four months while BNB delivered a quieter 7.4%, the bot needed only three rebalances to beat passive holding — not because the trigger was loose by accident, but because fewer, well-timed rebalances let the outperforming leg keep compounding before capital got pulled back to the anchor.

    That result lines up with what the AAVE/ONDO test found: the loosest trigger, not the most active one, produced the strongest outcome.

    Across both pairs, the bot’s edge came from resisting the urge to rebalance every small drift, and instead waiting for the divergence to become meaningful before acting.

    This is worth remembering before defaulting to a tight trigger “just to be safe” — over-rebalancing has a cost, and that cost is often invisible until you look at the trade count next to the return.

    XRP Surged 45% in 4 Months — Did Rebalancing Beat Passive Holding? →

    2. Where the Hero Setup Pulled Ahead

    The 5% trigger basically let ONDO run further between each rebalance, which meant it captured more of the breakout leg before locking gains back into AAVE.

    CEO Note:

    “A tighter trigger feels safer because it ‘does something’ more often. But the data says the loosest trigger let ONDO’s breakout actually compound instead of getting clipped every time it moved. Verify first, don’t assume.”

    Ngl, that’s the whole story of this test in one sentence.

    What This Divergence Test Teaches About Trigger Sizing

    So here’s the bottom line.

    Running the same AAVE/ONDO pair through three trigger widths didn’t just produce three numbers, it showed that a crypto rebalancing strategy for volatile altcoins lives or dies on how you size the trigger, not on picking a “perfect” coin.

    A 5% threshold on a crypto portfolio typically triggers somewhere between 8 and 15 rebalances a year, while a 10% threshold cuts that down to 3 to 6, trading responsiveness for lower costs.
    Source: Spark Money

    The tightest setting felt the most active, but it also bled the most into fees.

    The loosest setting looked almost lazy, five trades over the whole window, yet it let the winning leg actually compound before locking gains.

    That’s not luck.

    Does a tighter rebalancing trigger always mean better returns?

    Not really. A tighter trigger locks in gains more often, but it also racks up more trades and more fees, which can eat into the edge it’s trying to protect.

    That’s math working in your favor when you stop overtrading your own edge, exactly the discipline gap behind why so few retail traders stay consistently profitable across full market cycles.

    HISTORICAL DATA AUDIT

    Battle-Test Your Strategy
    Before the Market Does.

    Eliminate guesswork with institutional-grade backtesting for DCA, Grid, and Rebalance bots. Real historical data. Real-world results.

    EST. OPTIMIZATION +42% ROI Efficiency
    Start Backtest Now

    Sourced from 5+ Years of Exchange Data

    Before you copy Test C’s 5% trigger onto your own pair, run it yourself.

    Correlation, volatility, and how “breakout-y” your second asset is will all shift the ideal number.

    Test this setup yourself using the Rebalance Strategy Backtest Bot on CryptoGates, no signup, no credit card, just build and see what your own parameters say.

    FAQs

    What is a good coin ratio trigger for a volatile altcoin pair?

    It depends on your fee tier and risk comfort, but this test shows wider triggers around 5% captured more of a breakout with far fewer trades and less fee drag.

    Not automatically. The pairing only worked well here because the trigger width let the breakout leg run before locking in gains, so the trigger setting mattered as much as the pair itself.

    In this test, a 1% trigger produced 50 trades over the window, while a 5% trigger produced only 5, a big difference in cumulative fees.

  • You’re Probably Setting Your Grid Density Wrong 🎯: Here’s Why Fees 💸 Are Eating Your Profit 📉

    You’re Probably Setting Your Grid Density Wrong 🎯: Here’s Why Fees 💸 Are Eating Your Profit 📉

    You just added 50 more grids to your bot, and the profit number barely moved.

    Sound familiar?

    Here’s the thing about grid density grid trading bot setups: everyone assumes stacking more levels just means more money.

    More trades, more fills, more profit, right?

    Not exactly.

    Grid density is simply how many buy and sell levels sit inside your price range, and cranking that number up doesn’t scale your returns the way most beginners expect.

    The crypto trading bot market is on track to grow into a $35 billion industry, which tells you automation isn’t a side hobby anymore, it’s how a huge chunk of traders are choosing to operate.

    Source: KoinX

    Somewhere between “not enough grids” and “way too many grids,” there’s a spot where density actually works for you instead of against you.

    Finding it is the real skill.

    EXECUTIVE SUMMARY
    • The Problem: Most traders assume adding more grids to a bot automatically means more profit, then get confused when returns barely shift.
    • The Solution: Grid density has to match your price range and volatility, not just get maxed out because “more” sounds better.
    • The Incentive: Get the density right and you pull more out of the same range without bleeding it all back out in fees.
    • The Risk: Push density too high in a wide or trending range and fees can quietly eat more than the strategy captures.

    What “Grid Density” Actually Means in a Grid Bot

    Grid density sounds technical, but honestly, it isn’t.

    It’s just how many buy and sell levels your grid bot places between the top and bottom of your chosen range.

    Swipe to view full data →
    Aspect Low Grid Density High Grid Density
    Trade Frequency Fewer fills, spaced apart Frequent fills, tight spacing
    Fee Exposure Lower total fees Higher total fees over time
    Best Fit Wider, choppier ranges Tight, low-volatility ranges
    Management Feel Feels slower, less to watch Feels active, more to track

    Think of it like slicing a pizza.

    Fewer slices mean bigger pieces.

    More slices mean smaller ones.

    Same pizza either way.

    1. Why Most Beginners Default to a Low Grid Count

    Most new grid traders start small on purpose.

    A handful of grids feels safer. Feels easier to understand.

    Feels like less can go wrong. That instinct isn’t wrong exactly; it’s just incomplete.

    Real Backtest Example

    Fee Drag in Real Numbers

    Fees feel abstract until you count fills. In our XRP grid backtest, price opened at $2.08 and closed at $2.09 after 90 days, basically flat. The bot still fired 875 trades and generated $1,817.91 in gross grid profit. Net profit came in at $1,387.14, so about $430, roughly a quarter of the gross figure, sat between what the grid earned and what the trader kept.

    That’s the trade-off from this section in real numbers. The bot still returned 27.74% because the range was choppy enough for each fill to pay its own way. Fees only become a problem when the spacing between levels is too thin to cover what a round trip costs.

    Read the full test: XRP Went Nowhere for 3 Months – Our Grid Bot Made +27.74% Anyway

    Low density keeps things simple.

    Fewer trades, fewer numbers, fewer decisions to second-guess.

    But simple doesn’t always mean optimal, and that’s usually where the confusion kicks in for a lot of traders once they see someone else running double their grid count.

    2. What Changes When You Push the Grid Count Higher

    Add more levels and the bot starts firing more often, like the 55-grid SUI bot that fired 1,759 trades in 38 days.

    More buys, more sells, more small wins stacking up through the day.

    Sounds great, until you remember that the real cost of a trade runs well above the advertised fee.

    Does adding more grids to a bot always increase profit?

    Not really. More grids mean more trades, but each trade adds a fee. Past a certain point, those extra fees can quietly cancel out the gains from all that added activity.

    Wait, here’s the issue.

    Fees eat into that stack of small wins fast, especially on exchanges like Binance or Pionex, where fills happen constantly, and Pionex’s 0.05% trading fee applies to every one of them.

    The bot isn’t doing anything wrong by trading more.

    The range and fee structure just need to actually support that pace.

    Does More Grids Always Mean More Profit?

    The honest answer is it depends, and that’s probably not what you wanted to hear.

    Grid count doesn’t work in a vacuum.

    It works against your price range, your volatility, and how much of your gains fees are allowed to eat.

    Real Backtest Example

    20 vs. 45 vs. 80 Grids on NEAR

    • Strategy: Grid bot, tested at three different densities
    • Coin: NEAR
    • Market condition: One shared 45-day window, so grid count was the variable being tested
    • Objective: See whether more grids actually beat fewer, and whether either beat buy & hold
    • Key result: The 45-grid setup returned 17.18% ROI and was the only configuration to beat buy & hold. The 20-grid and 80-grid versions both trailed it.

    Expert interpretation: Neither extreme won, which is the same trade-off this article describes. Too few levels leave price swings uncaptured. Too many squeeze the profit on each level against trading costs. The middle setup won on this range, and a different range or volatility profile would likely move that sweet spot.

    Full test: 20 Grids, 45 Grids, 80 Grids: Only One Beat Buy & Hold on NEAR

    Zoom out for a second.

    A grid bot is basically farming small, repeated price swings inside a box.

    Density decides how finely you’re slicing that box.

    Slice too coarse, and you miss moves. Slice too fine, fees start winning instead of you.

    SYSTEM ACCESS: CG4.2

    Stop Guessing.
    Stress Test Your Edge.

    The market doesn’t care about your backtest. Our engine simulates 1,000+ “what-if” scenarios to ensure your strategy is built for survival.

    Run Crypto Strategy Engine →
    ROBUSTNESS SCORE
    75+ STRUCTURAL EDGE
    RISK OF RUIN < 1%
    TARGET HIT 92%

    1. The Trade Frequency vs. Fee Drag Balance

    Every extra grid level you add is another chance for a fill, sure, but it’s also another fee.

    That trade-off is the entire game here.

    In a market that’s barely moving, tighter grids catch more of the small wiggle.

    In a market swinging wide, wider grids let you actually capture the bigger moves without wasting fills on noise.

    Trading fees on major exchanges typically run in the 0.1% range per side, which sounds tiny until a bot is stacking hundreds of trades against the same capital pool.

    Source: Binance

    Look, this is exactly why “just max out the grids” is bad advice without context.

    Frequency without a fee-aware structure is just… expensive noise.

    2. When a Tight, Choppy Range Rewards Higher Density

    Not every setup punishes high density, though.

    When a coin gets stuck grinding sideways in a narrow band, and this happens more often than people realize, higher density can actually thrive.

    Smaller, more frequent captures inside a tight box tend to add up faster than a handful of wide, spaced-out trades.

    When should a trader use more grids instead of fewer?

    More grids tend to work better in a tight, low-volatility range where price keeps bouncing inside a small band. In a wider or trending market, fewer, wider grids usually hold up better.

    The overlooked factor here is range width.

    A dense grid inside a wide range is where fee drag usually shows up worst.

    A dense grid inside a genuinely tight range is a different story entirely.

    Finding Your Own Grid Density Sweet Spot

    There’s no universal magic number here, and honestly, anyone who tells you otherwise is skipping the part where your range and volatility actually matter.

    Somewhere around 15 to 30 grids tends to be a reasonable starting range for most setups, though that number shifts depending on how tight your price box is and how much fee drag your exchange charges per trade.

    HISTORICAL DATA AUDIT

    Battle-Test Your Strategy
    Before the Market Does.

    Eliminate guesswork with institutional-grade backtesting for DCA, Grid, and Rebalance bots. Real historical data. Real-world results.

    EST. OPTIMIZATION +42% ROI Efficiency
    Start Backtest Now

    Sourced from 5+ Years of Exchange Data

    The real move isn’t guessing your way to a density that feels right.

    It’s testing a few counts against the same range and watching what the numbers actually say, which is exactly what CryptoGates’ Grid Strategy Backtest Bot is built for.

    FAQs

    What is grid density in crypto grid trading?

    Grid density refers to how many buy and sell levels a grid bot places inside your chosen price range. Higher density means tighter spacing between levels.


    No. More grids mean more trades and more fees, so returns don’t scale in a straight line. The right count depends on your range and volatility.


    Backtest a few different grid counts against the same price range and compare the results. That’s the only reliable way to see what actually fits your setup.


  • Bitcoin ₿ Resistance 🧱 Holds Again After a Rate Hike 📈 and a Failed Crypto Bill

    Bitcoin ₿ Resistance 🧱 Holds Again After a Rate Hike 📈 and a Failed Crypto Bill

    Bitcoin just ran into the same wall twice.

    Sellers showed up near 82K on Sep 3, and again this weekend.

    That came in a week with a Fed rate hike and a failed Senate vote on the CLARITY Act.

    Weekly net for spot Bitcoin ETFs was about +$6.1M

    Source: Farside Investors

    So this Bitcoin resistance now decides how risky your next trade is.

    EXECUTIVE SUMMARY
    • The Problem: Price hit the same ceiling twice in under three weeks.
    • The Solution: Watch ETF flows and how price acts at the level, not just the wick.
    • The Incentive: Waiting for confirmation can save you from a false breakout.
    • The Risk: Chop below the ceiling punishes leverage in both directions.

    Bitcoin Resistance Holds Again After a Rate Hike and a Failed Crypto Bill

    The Fed raised rates, the Senate blocked a crypto bill, and Bitcoin still sits near 80.4K. Hts qalnz msz rejected at the same Bitcoin resistance near 82K for the second time, first on Sep 3 and again this weekend.

    That’s the part worth watching. A level that keeps rejecting price tells you how risky the next trade really is.

    What Happened Near the Bitcoin Resistance Level

    Look, it was a loud week.

    The Fed raised its target range by 25 bps to 3.75%-4%. Then the Senate vote on the CLARITY Act failed 49-50, short of the 60 needed. It was a vote to move forward, not final passage.

    Both moves were largely expected. So Bitcoin holding near 80.4K is useful information, but it isn’t proof of strength.

    Sellers first showed up near 82K on Sep 3. They came back this weekend.

    Second test, same wall.

    ETF Flows Swung Hard, Then Went Flat

    Spot Bitcoin ETF flows told a wilder story than price.

    Swipe to view full data →
    Date Net Flow Direction
    Sep 15 -$450.4M Outflow
    Sep 16 -$295.9M Outflow
    Sep 17 +$159.5M Inflow
    Sep 18 +$433.0M Inflow

    Weekly net covers the full Monday-to-Friday week, so these are selected days.

    That’s about six million dollars net. Flat by Friday. Well, flat at the end, not along the way.

    Here’s the thing.

    August’s rally was mostly short covering zrkdna dfxx fresh buying. Squeezes fade when nothing new steps in behind them. Sustained ETF demand is that something new.

    Three Scenarios to Watch Next

    These are scenarios, not predictions.

    If price holds above the ceiling and flows stay positive, the level flips into a support candidate. Another rejection with fading flows brings the 77K to 78K shelf back into play.

    CEO Note:

    A wick above a level is not acceptance. Honestly, I’d rather miss the first move than chase one that hasn’t been earned. Let the data confirm it, then scale slowly.

    Chop below the ceiling?

    Leverage gets punished both ways.

    What to Watch Next

    Same ceiling, flat flows, no confirmation yet. Watch ETF flows and how price acts near 82K.

    Want to test a plan first?

    The CryptoGates backtesting tool is free, so you can check it before risking real money.

    Verify first. Risk later. Scale slowly.

    HISTORICAL DATA AUDIT

    Battle-Test Your Strategy
    Before the Market Does.

    Eliminate guesswork with institutional-grade backtesting for DCA, Grid, and Rebalance bots. Real historical data. Real-world results.

    EST. OPTIMIZATION +42% ROI Efficiency
    Start Backtest Now

    Sourced from 5+ Years of Exchange Data

    FAQs

    Why does Bitcoin keep getting rejected near 82K?

    Sellers appeared there on Sep 3 and again this weekend. August’s rally was mostly short covering, so sustained ETF demand is what a real breakout would need.

    No. A wick above a level isn’t acceptance. Look for price to hold above it while ETF flows stay positive.

  • The DCA Setting Everyone Ignores ⏳ Until It Costs Them the Whole Move 📉💰

    The DCA Setting Everyone Ignores ⏳ Until It Costs Them the Whole Move 📉💰

    You set your DCA bot, pick a coin you actually believe in, and walk away feeling like you’re in control.

    Then the price rips hard in a matter of days, and your bot exits way too early, or worse, it just sits there waiting on a level that never comes.

    Sound familiar?

    Here’s the thing: your entry price usually isn’t the problem.

    Your DCA take-profit percentage is doing most of the work in the background, and almost nobody stops to question the number they picked.

    Research shows 70% of traders miss their ideal profit-taking moment because they let daily emotions override a plan they already had in place.

    Source: Tradeciety Analysis

    Most traders just copy a round number from a video and call it a strategy, which is exactly the kind of shortcut behind the biggest DCA mistakes crypto investors keep making.

    That’s a guess wearing a strategy’s clothes.

    EXECUTIVE SUMMARY
    • The Problem: Traders pick a take profit level once and never test it, quietly capping what their DCA bot could actually earn.
    • The Solution: Backtest your exit percentage against real historical data instead of guessing a round number that feels safe.
    • The Incentive: Capture more of a genuine move before your bot forces you out of it early.
    • The Risk: Not financial advice, and past price action never guarantees what happens next.

    Why Take Profit Percentage Is the One Lever That Decides Your DCA Outcome

    A DCA bot handles the buying side pretty well.

    It scales into a coin as the price drops, lowers your average cost, and takes the panic out of catching a falling knife.

    But nobody talks about the exit side nearly enough, and that’s where most of the real damage happens.

    Swipe to view full data →
    Behavior Wide TP (5%+) Tight TP (1-2%)
    Exit frequency Low Very high
    Fee drag over time Small Adds up fast
    Exposure to reversal Higher Lower
    Upside captured per exit Larger Smaller

    Your take profit percentage decides two things at once.

    It decides how often you cash out, and it decides how much of a real move you actually get to keep.

    Set it wrong in either direction, and the bot will do exactly what you told it to, just not what you wanted.

    1. What Happens When Take Profit Is Set Too Wide

    Look, a wide target sounds great on paper.

    Bigger wins, fewer trades, less noise.

    But here’s the catch: you’re holding through more chop while you wait, and crypto loves to give back gains just as fast as it hands them out.

    If the coin rolls over before hitting your target, you ride the whole reversal down with nothing locked in.

    Real Backtest Example

    What the Data Actually Shows

    Strategy: DCA bot, tight-frequency exit setting
    Coin: BTC
    Market Condition: Steady uptrend (+14.5% over the test window)
    Objective: Capture upside while managing entry risk

    This is the exact scenario described above, playing out with real capital. Across the test window, BTC climbed nearly 15%, and the DCA bot closed 8 of 9 sessions in profit – a clean, low-drama result on paper. But a simple buy-and-hold position outperformed it by $119.81 over the same period.

    The bot wasn’t broken. It did precisely what it was configured to do: take small, frequent profits. The cost showed up as opportunity, not loss — every early exit was capital pulled out of a move that kept climbing without it.

    This is the trade-off a tight take profit setting always makes, whether or not the trader notices it happening.

    BTC Ran +14.5% and Our DCA Bot Only Made $40

    2. What Happens When Take Profit Is Set Too Tight

    A tight target feels safer, and it does close trades fast.

    The problem is fees.

    Every exit costs something, and stacking dozens of small wins on a coin that’s genuinely trending, like the stretch where our DCA bot made just $40 during BTC’s 14.5% rally, can leave you with less profit than a trader who just let one position run.

    SYSTEM ACCESS: CG4.2

    Stop Guessing.
    Stress Test Your Edge.

    The market doesn’t care about your backtest. Our engine simulates 1,000+ “what-if” scenarios to ensure your strategy is built for survival.

    Run Crypto Strategy Engine →
    ROBUSTNESS SCORE
    75+ STRUCTURAL EDGE
    RISK OF RUIN < 1%
    TARGET HIT 92%
    What is a good take profit percentage for a DCA bot?

    There’s no universal number. It depends on the coin’s volatility and whether the market is trending or ranging, which is exactly why backtesting your setting matters more than copying someone else’s.

    You basically pay to get out early, over and over.

    How a Fast-Moving Market Changes Your DCA Take Profit Percentage

    A tight take-profit setting might look great in a backtest report and still fall apart the moment the market shifts personality.

    That’s the part most guides skip.

    The same number behaves completely differently depending on whether coins are trending hard or just chopping sideways.

    Research Insight

    Many traders read a high win rate – 50 out of 51 sessions closed green, say – and assume the strategy is performing well. Session count and profit are not the same measurement, and conflating them is one of the more common mistakes in evaluating a bot’s output.

    In one 87-day test run during a sustained LINK rally, a DCA bot closed 50 of 51 sessions in profit and still only edged out simple buy-and-hold by $55.20 — despite deploying 3.3 times more capital to get there. The bot was “working” the entire time. It just wasn’t working efficiently against a trending market.

    This is the same dynamic described above: a high exit frequency can look like diligence while quietly producing a worse capital-to-return ratio than doing nothing at all.

    We DCA’d LINK Through the Chainlink Reserve Surge

    1. Compounding Uptrends vs Sideways Ranges

    In a range-bound market, a tight TP makes sense.

    Price keeps bouncing between the same levels, so grabbing small wins over and over actually adds up.

    But drop that same tight setting into a coin that’s compounding fast, and you’re basically stepping off an escalator every few floors while it keeps climbing without you.

    A Bank for International Settlements review across dozens of countries found roughly 75% of retail crypto investors lost money on their holdings, mostly from poor exit timing during rallies.

    Source: Bank for International Settlements

    Here’s the interesting part.

    In a genuine trend, a wider TP often outperforms, not because it’s smarter, but because it just gets out of the way and lets the move happen.

    2. Why More Sessions Doesn’t Always Mean More Profit

    A tight TP produces a lot of closed sessions.

    It looks active.

    It looks like the bot is working hard for you. But session count isn’t profit, and a report full of green checkmarks can still land on a negative total.

    Does DCA work better in a bull market or a bear market?

    DCA is built to survive both, but your take profit setting needs to adapt. Bull runs usually reward wider targets, while ranging or bearish conditions tend to favor tighter, more frequent exits.

    Research by Barber and Odean found that the more retail traders traded, the worse their returns got, even before fees were counted.

    A bot doesn’t get bored or restless the way a person does, but it will still overtrade if you hand it a setting that forces constant exits.

    Finding a Take Profit Range That Fits Your Strategy

    There’s no magic number here, and ser, anyone who hands you one without context is guessing just like you were before.

    Interactive Checklist

    • Check your exchange’s trading fee before picking a tight TP, since fees compound with every exit
    • Compare at least two or three TP percentages against the same historical window
    • Watch how many sessions stay incomplete when the market trends instead of ranging
    • Look at max drawdown alongside profit, not profit alone
    • Confirm your setting still makes sense if the trend suddenly reverses

    What actually works is testing a range against the specific coin and conditions you’re trading, not copying a setting that worked for someone else’s altcoin six months ago.

    CG STRATEGY ANALYZER

    Confused about
    market outlook?

    Trading without a plan is just gambling. Our strategy architect analyzes your risk tolerance and capital to match you with a proven algorithmic framework.

    PASSIVE DCA Bot
    AGGRESSIVE Grid Pro
    BALANCED Rebalance

    Testing Your Assumption Before You Automate It

    This is where things change for most people.

    Instead of setting a TP and hoping, you can run it through CryptoGates’ Strategy Engine and stress-test it across a wide range of simulated conditions before a single dollar goes live.

    It won’t tell you the future, but it’ll tell you if your setting is built on something real or just a number that felt right.

    Stop Guessing Your DCA Take Profit Percentage

    Honestly, the whole point here isn’t finding some perfect number that works forever.

    Markets change, and the setting that crushed it during one run might drag during the next.

    What actually matters is knowing why your take-profit level works before you let a bot execute it with real money.

    CEO Note:

    “We didn’t build CryptoGates so people could guess with more confidence. Verify first. Risk later. Scale slowly. That’s the whole philosophy, and your take profit setting is exactly where it applies.”

    Wait, before you go set this up.

    Run it through the DCA Strategy Backtest Bot first and see how your specific pair and TP setting actually behaved across real historical data, not a hunch.

    HISTORICAL DATA AUDIT

    Battle-Test Your Strategy
    Before the Market Does.

    Eliminate guesswork with institutional-grade backtesting for DCA, Grid, and Rebalance bots. Real historical data. Real-world results.

    EST. OPTIMIZATION +42% ROI Efficiency
    Start Backtest Now

    Sourced from 5+ Years of Exchange Data

    FAQs

    What take profit percentage should I use for a DCA bot?

    There’s no single right answer since it depends on the coin’s volatility and the current trend. Backtest a few options before committing to one.


    Not really. It reduces exposure per trade but increases fee drag and the chance of exiting a real trend way too early.


    Yes, and you should revisit it whenever market conditions shift from ranging to trending or back again.


  • Why Your Grid Bot’s Grid Density 🎯 Keeps Overtrading and Losing to Fees 💸 in Choppy Markets 📉

    Why Your Grid Bot’s Grid Density 🎯 Keeps Overtrading and Losing to Fees 💸 in Choppy Markets 📉

    Look, most people setting up a grid bot for the first time just pick a number. 20 grids?

    Sure. 50? Why not.

    Nobody tells them that this one setting, the grid density, quietly decides whether the bot prints steady gains or slowly bleeds them out through fees.

    In a choppy, range-bound market, that difference gets amplified fast.

    In one backtest comparing grid counts on the same asset and price range, moving from 70 grids down to 15 grids lifted ROI from 12.86% to 13.50% over the same 30-day window.

    Source: CryptoGates Internal Backtest, 2026

    Too few grids and price slips right past your levels without triggering a single trade.

    Too many and you’re paying fees on trades that barely move the needle.

    The right grid density isn’t a guess; it’s something you can actually test with a grid backtest bot before you risk a cent.

    EXECUTIVE SUMMARY
    • The Problem: Traders pick a grid count arbitrarily, without knowing how it affects trade frequency, fee drag, or missed price swings.
    • The Solution: Backtest a few different grid densities on the same range and compare ROI, trade count, and fees before committing capital.
    • The Incentive: The right density can mean the difference between a bot that quietly compounds and one that just spins its wheels.
    • The Risk: Even a well-chosen grid density can underperform if the market breaks out of its range instead of staying choppy.

    What Grid Density Actually Means

    Here’s the thing.

    Grid density just means how many price levels your bot places buy and sell orders on, between your set high and low.

    That’s it.

    But this one number changes almost everything about how the bot behaves.

    Swipe to view full data →
    Grid Count Trade Size Trade Frequency
    Low (15) Larger Fewer trades
    Medium (35) Moderate Moderate
    High (70) Smaller Frequent trades

    A bot with 15 grids across a range trades in bigger steps.

    A bot with 70 grids across the same range trades in much smaller steps, consistent with Binance’s own grid trading documentation, which confirms that more grids directly increase trade frequency.

    1. More Grids vs Fewer Grids – The Core Trade-off

    More grids mean the bot reacts to smaller price moves.

    It buys and sells more often, in smaller chunks.

    Fewer grids mean it waits for bigger swings before doing anything.

    Neither is automatically better. It depends on how the asset is actually moving, and honestly, that’s where most people get it wrong.

    They assume more activity equals more profit.

    Real Backtest Example

    Strategy: Grid
    Coin: NEAR/USDT
    Market Condition: Sideways-to-volatile, 45-day window
    Objective: Test whether grid density itself — independent of asset choice — determines outcome

    CryptoGates ran the same range on NEAR at three different densities: 20, 45, and 80 grids. Only the 45-grid configuration outperformed a simple buy-and-hold position over the test window; the 20-grid version spaced its levels too far apart to catch the daily chop, while the 80-grid version generated activity without a proportional payoff once fees were netted out.

    Key Result: 45 grids delivered a 17.18% ROI — the only one of the three densities to beat passive holding.

    Expert Interpretation: The finding backs up what this article argues structurally: density isn’t a “more is better” dial. There’s a middle band where trade frequency matches the asset’s actual volatility, and moving away from it in either direction costs money.

    View Complete Playbook →

    2. Why “More Trades” Doesn’t Always Mean More Profit

    This is where things change.

    More trades sounds productive, but every single trade carries a fee, as Binance Academy’s breakdown of maker and taker charges makes clear.

    If your profit per grid is thin and your fee eats into most of it, a high trade count can look busy on paper while barely growing your account.

    It’s not about how often the bot fires. It’s about what’s left after fees on every one of those fires.

    SYSTEM ACCESS: CG4.2

    Stop Guessing.
    Stress Test Your Edge.

    The market doesn’t care about your backtest. Our engine simulates 1,000+ “what-if” scenarios to ensure your strategy is built for survival.

    Run Crypto Strategy Engine →
    ROBUSTNESS SCORE
    75+ STRUCTURAL EDGE
    RISK OF RUIN < 1%
    TARGET HIT 92%

    What Happens When You Use Too Few Grids

    Picture this.

    Your range is wide, but you’ve only set 15 grids across it – one of the common grid trading mistakes that quietly caps returns before a single trade fires.

    Price chops back and forth in a tight little pocket for days, bouncing between two of your levels without ever reaching the next one.

    The bot just sits there.

    Nothing happens. Meanwhile, the market is technically moving, generating exactly the kind of small swings a grid strategy is built to catch, and your bot is too spread out to notice.

    1. Missed Intraday Swings In Choppy Markets

    Choppy markets are made up of lots of small moves, not one big one.

    If your grid lines are too far apart, most of that daily noise slides right past your trade levels.

    You end up watching the price move without your bot ever getting involved.

    2. Larger Profit Per Trade But Fewer Chances To Catch It

    To be fair, wide spacing isn’t all bad.

    When a trade does trigger, it usually pays more per fill since the price moved further to get there.

    Is more grids better in a grid bot?

    Not automatically. More grids catch smaller moves but rack up more fees per trade. It depends on your range, volatility, and how thin your profit per grid is set.

    The problem is you’re relying on fewer, bigger moves instead of a steady stream of smaller ones.

    Fewer chances mean more time sitting idle, and idle capital isn’t doing much for you.

    What Happens When You Use Too Many Grids

    Now flip it. Say you cram 70 grids into the same range.

    Suddenly the bot is firing constantly, catching every little wiggle in price. Sounds great on the surface. But here’s the catch.

    Each of those trades still pays a fee, and when your grids are packed that tight, the profit per trade shrinks down close to what the fee actually costs.

    1. Fee Drag Eats Into Small Profits

    When profit per grid gets thin, fees stop being a rounding error and start being a real cost. A 0.1% fee barely dents a fat trade. On a tiny one, it can quietly wipe out a big chunk of what you would’ve kept. Run enough of these small trades and the fee drag adds up fast, even while the bot looks “active” and “working.”

    Research Highlight

    One pattern rnorlvkaxhip nwxeycz in CryptoGates’ internal testing of flat, low-volatility markets: when a grid is dense enough to match the market’s actual noise, it can extract meaningful returns from a coin that’s barely moving.

    In a 90-day backtest, XRP opened and closed within a cent of each other – effectively flat. A buy-and-hold position earned almost nothing. A correctly sized grid, by contrast, fired 875 trades across that same flat range and closed at a 27.74% return. That gap didn’t come from predicting direction. It came from having enough grid lines to actually register the small back-and-forth moves a wider spacing would have slept through.

    This is the direct cost of under-gridding described above: it’s not a theoretical risk; it shows up as a multi-thousand-dollar gap in real test data.

    View Complete Playbook →

    2. Overtrading In Sideways Chop

    This is the part that surprises people.

    In a sideways, choppy market especially, the bot ends up buying and selling the same tiny range over and over. Trade count looks impressive.

    Account growth doesn’t match it.

    You’re basically paying the exchange to move your money back and forth without much to show for it.

    CONFIDENTIAL // RESEARCH
    STRATEGY INTELLIGENCE

    Proven Setups &
    Expert Breakdowns.

    We don’t just show you the data; we engineer and validate high-performance strategies, providing the “Alpha” behind the numbers.

    Finding The Balance – Signs Your Density Is Right

    The simple truth is that the sweet spot usually sits somewhere between these two extremes, and where exactly depends on the asset and how it’s moving.

    There’s no universal “best” grid count. There’s a best grid count for this range, this volatility, this moment.

    1. Matching Grid Count To Volatility And Price Range

    A wide price range with big daily swings can usually support more grids without the fee drag getting out of hand.

    A tight range with small moves often does better with fewer, wider-spaced grids, so each trade actually earns something worth keeping.

    2. Why Moderate Density Tends To Win In Choppy Ranges

    In a backtest across the same 30-day window on the same pair, a moderate-to-low grid count outperformed a much higher one, mostly because it caught enough of the real swings without giving so much back in fees.

    How do I choose the right number of grids for a grid bot?

    Start by testing a few densities on the same range and comparing ROI, trade count, and fees paid. The setting that keeps fee drag low while still catching the range’s normal swings is usually your answer.

    It wasn’t about trading more. It was about trading smarter within the range.

    Test Your Own Grid Density Before You Automate

    At the end of the day, grid density isn’t a setting you should guess and forget. It’s the difference between a bot that quietly compounds gains in a choppy range and one that trades constantly while going nowhere.

    HISTORICAL DATA AUDIT

    Battle-Test Your Strategy
    Before the Market Does.

    Eliminate guesswork with institutional-grade backtesting for DCA, Grid, and Rebalance bots. Real historical data. Real-world results.

    EST. OPTIMIZATION +42% ROI Efficiency
    Start Backtest Now

    Sourced from 5+ Years of Exchange Data

    Before you lock in a number, run it through the Grid Strategy Backtest Bot on your own pair and range.

    See how 15 grids perform against 35 or 70 under the exact same conditions. The data will tell you more than any rule of thumb ever could.

    FAQs

    Does grid density affect risk in a grid bot?

    Yes. More grids mean smaller, more frequent trades with less exposure per trade. Fewer grids mean bigger swings and more capital tied up per trade level.


    Generally, yes. Higher volatility ranges can often support more grids, while tighter, calmer ranges tend to favor fewer, wider-spaced ones.


    Yes. Backtesting different grid counts on the same range and asset shows you the ROI, trade frequency, and fee impact before you risk real capital.


  • Your Rebalance Bot’s Secret Setting ⚙️: Why Trigger % Decides Everything 📊 Before Fees Eat Your Edge 💸

    Your Rebalance Bot’s Secret Setting ⚙️: Why Trigger % Decides Everything 📊 Before Fees Eat Your Edge 💸

    Ser, quick question.

    You just set your rebalance bot’s trigger % and hit run, right?

    Most traders do exactly that, then wonder later why their bot fired thirty times or barely fired at all.

    That one number, your coin ratio trigger percentage, decides almost everything about how your rebalance bot behaves.

    Set it too tight and fees eat your edge. Set it too loose and the bot misses the exact moves it was built to catch.

    A near century-long Vanguard study found monthly or quarterly rebalancing added no real return benefit over annual, just higher turnover.

    Jaconetti, Kinniry, Zilbering, Vanguard (via Kitces.com)

    This isn’t a “set it once” kind of setting.

    It’s the difference between a bot that works with the market and one that fights it.

    EXECUTIVE SUMMARY
    • The Problem: Most traders pick a coin ratio trigger % randomly, without knowing it controls trade frequency, fee drag, and how closely the bot tracks market swings.
    • The Solution: Backtest a few trigger percentages on the same pair and timeframe before deciding which one fits your strategy.
    • The Incentive: A well-tuned trigger % can mean the difference between a bot that quietly compounds gains and one that just racks up fees.
    • The Risk: Even a well-picked trigger % can still underperform a simple hold strategy in a strong trending market. Not financial advice.

    What Coin Ratio Trigger % Actually Controls

    Here’s the thing.

    A rebalance bot doesn’t watch the price.

    It watches the ratio between your two assets.

    Say you’re running BTC/USDC at a 50/50 split. As BTC moves, that ratio drifts away from 50/50, the exact crypto portfolio drift a rebalancing bot exists to correct.

    he trigger % is basically your tolerance for that drift before the bot steps in and pulls things back to target.

    Reality Check

    Strategy: Rebalance Bot (BTC/ETH pair, 50/50 target)
    Coin: ETH / BTC
    Market Condition: Strong divergent trend — ETH surged +24% while BTC dropped -7% over August 2025
    Objective: Test whether a rebalance bot’s drift-based logic holds up when one asset trends hard against the other, instead of chopping sideways
    Key Result: Two of three tested trigger variants lost money. The bot did exactly what it’s built to do – sell the outperformer, buy the underperformer – and got punished for it, since ETH kept climbing after being sold and BTC kept falling after being bought. Only the variant with the least activity survived the window.
    Expert Interpretation: This is the other side of the tight-vs-loose coin. A trigger that looks disciplined in a ranging market can work directly against you the moment one asset breaks into a sustained trend, because the bot only sees ratio drift – it has no concept of trend direction.

    it has no concept of trend direction.

    One Asset Soared. One Collapsed. Our Rebalance Bot Picked the Wrong Side 249 Times

    Think of it like a rubber band.

    A tight trigger means the band snaps back the second it stretches a little.

    A loose trigger lets it stretch further before anything happens. Neither is automatically better.

    It just changes what kind of bot you’re running.

    SYSTEM ACCESS: CG4.2

    Stop Guessing.
    Stress Test Your Edge.

    The market doesn’t care about your backtest. Our engine simulates 1,000+ “what-if” scenarios to ensure your strategy is built for survival.

    Run Crypto Strategy Engine →
    ROBUSTNESS SCORE
    75+ STRUCTURAL EDGE
    RISK OF RUIN < 1%
    TARGET HIT 92%

    1. How the Bot Decides When to Fire

    Every time the price moves, the bot checks the current split against your target split.

    If the drift crosses your trigger %, it rebalances, the same logic behind Binance’s rebalancing bot threshold settings.

    That’s it.

    No trend analysis, no prediction. Just a rule based on drift.

    This is exactly what makes it a system instead of a gut call. The bot doesn’t get emotional about BTC ripping to a new high. It just checks the number.

    2. Why This Single Setting Changes Everything Downstream

    This is where things change.

    Trigger % isn’t just a technical setting buried in the parameters box.

    It’s the lever behind three things that actually matter to your bottom line: how many trades you make (in this BTC/ETH divergence rebalance backtest, that number spiraled to 249), how much you pay in fees, and how closely your returns end up tracking BTC’s own trend versus just sitting flat.

    Change the trigger, and you change all three at once.

    That’s a lot of leverage sitting in one dropdown menu.

    Tight vs Loose Triggers, What Actually Happens

    Let’s break this down with an actual test.

    Same pair, same investment, same timeframe.

    Only the trigger % changes.

    This is the fairest way to see what a single-variable shift does to your results, instead of guessing.

    A rebalancing study found monthly rebalancing produced no real risk or return edge over annual, just more turnover.

    Jaconetti, Kinniry, Zilbering, Vanguard (via Kitces.com)

    That’s not a crypto-specific study, but the logic holds.

    Swipe to view full data →
    Trigger % Trades ROI
    1% (Test A) 30 16.64%
    5% (Test B) 2 16.69%
    2% (Test C) 9 16.71%

    More rebalances doesn’t automatically mean more profit.

    Sometimes it just means more fees.

    1. Low Trigger (Frequent Rebalancing)

    A 1% trigger is trigger-happy.

    In the test above it fired 30 times over roughly five and a half months.

    That’s a lot of small sells and buys chasing every little wiggle in the BTC/USDC ratio. More trades means more fee events too, and at Binance’s standard 0.1% spot trading fee per rebalance, that adds up fast when you’re doing it thirty separate times.

    The upside?

    It’s disciplined. It never lets drift build up. The downside, honestly, is that in a smooth uptrend it can be overkill.

    2. High Trigger (Rare Rebalancing)

    Now flip it.

    A 5% trigger barely moved, just two rebalances across the whole test window.

    Fewer fees, less noise, way less babysitting, and less exposure to the hidden cost of every trade that frequent rebalancing quietly racks up.

    Real Backtest Example

    Strategy: Rebalance Bot, 5% ratio trigger
    Coin: ENA / ASTER
    Market Condition: Dual-asset bearish quarter — both freshly listed coins declining together
    Objective: See how a wider 5% trigger threshold behaves when there’s no diverging winner to catch, just two falling assets
    Key Result: The wide threshold kept the trade count low and fee drag minimal, and still preserved measurable value over simply holding both coins through the bearish quarter.
    Expert Interpretation: This tracks with the loose-trigger pattern from the BTC/USDC test above — fewer rebalances, lower fees — but on a different pair and a different market condition entirely, which is exactly why it’s worth cross-checking before treating 5% as a safe default setting.

    Two Freshly Listed Coins, One Brutal Quarter

    A wide trigger can let the portfolio drift far from target before doing anything about it, which means it might sit through a chunk of upside or downside without adjusting.

    What is a good coin ratio trigger % for a rebalance bot?

    There’s no universal number. It depends on your pair’s volatility and how much fee drag you’re willing to accept for tighter tracking.

    In this specific test it actually landed the highest ROI of the three, 16.69%, but that’s one backtest window.

    Chop, dump, or a longer sideways stretch could flip that result completely.

    What This Means for a BTC/USDC Rebalance Strategy

    Picture this.

    BTC in a strong uptrend, USDC just sitting there as flat ballast.

    That’s basically the setup in the test above, an uptrend running from spring into fall.

    In a run like that, a rebalance bot is constantly selling BTC strength to top up USDC, then buying BTC back on dips. It’s profit-taking on autopilot.

    Sounds great. Except.

    Reading the Rebalancing Edge Against a Hold Strategy

    Here’s the part most beginners miss.

    Rebalancing isn’t automatically better than just holding.

    In this same test, a straight Buy & Hold on the BTC side alone would’ve returned 17.15%. All three rebalance configs, even Test C at 16.71%, landed under that number.

    That gap between your rebalance ROI and the Hold benchmark is sometimes called the rebalancing edge, and here it came out negative across the board.

    CG STRATEGY ANALYZER

    Confused about
    market outlook?

    Trading without a plan is just gambling. Our strategy architect analyzes your risk tolerance and capital to match you with a proven algorithmic framework.

    PASSIVE DCA Bot
    AGGRESSIVE Grid Pro
    BALANCED Rebalance

    Why?

    Because BTC didn’t chop, it trended.

    Rebalance bots are built to harvest volatility inside a range.

    When one asset just runs, taking profit along the way can mean handing back some of the total gain compared to holding the whole ride.

    That’s not a flaw in the bot.

    It’s math doing exactly what it’s supposed to do given the market condition it was tested in.

    How to Pick a Trigger % Before Risking Capital

    Realistically, nobody can tell you the “correct” trigger % without testing it on your actual pair.

    What worked for BTC/USDC across one six-month uptrend won’t necessarily hold for a different pair, a longer window, or a choppier market.

    Interactive Checklist

    • Pick your pair and confirm the trend, range, or chop conditions of your test window
    • Run at least three trigger % values on the same window (tight, mid, wide)
    • Compare trade count and total fees paid across all three
    • Check ROI against a simple Hold of the same asset split
    • Repeat the test on a different timeframe before trusting the result

    The overlooked factor here is that trigger % interacts with market regime.

    A setting that looks great in a trend might look mediocre in a range, and vice versa.

    What to Watch For in Your Own Test

    Watch three numbers side by side. Trade count tells you how active the bot got. Fees paid tells you what that activity cost you.

    CEO Note:

    It plainly. Verify first. Risk later. Scale slowly. A trigger % isn’t a guess you make once and forget. It’s a number you test, compare, and only then trust with real capital.

    And ROI versus Hold tells you whether the activity was actually worth it.

    If your rebalance ROI is beating Hold while trades stay reasonable, ser, that’s a genuinely good sign.

    Does a tighter rebalance trigger always mean better returns?

    No. Tighter triggers mean more trades and more fees, but returns depend on whether the market is trending or ranging during your test window.

    If it’s underperforming Hold with a pile of trades and fees on top, the trigger % probably needs adjusting, or the strategy just isn’t suited to that market condition.

    Test Your Trigger % Before You Automate

    The bottom line here isn’t complicated.

    Coin ratio trigger % isn’t a small technical detail buried in a settings panel, it’s the single variable that decides how often your bot trades, how much you pay in fees, and whether you end up ahead of or behind a simple Hold.

    The only way to know which trigger fits your pair is to run it through a real backtest first, not guess based on what worked for someone else’s setup on CT.

    CONFIDENTIAL // RESEARCH
    STRATEGY INTELLIGENCE

    Proven Setups &
    Expert Breakdowns.

    We don’t just show you the data; we engineer and validate high-performance strategies, providing the “Alpha” behind the numbers.

    Test this setup yourself using the Rebalance Strategy Backtest Bot before you automate anything with real capital.

    HISTORICAL DATA AUDIT

    Battle-Test Your Strategy
    Before the Market Does.

    Eliminate guesswork with institutional-grade backtesting for DCA, Grid, and Rebalance bots. Real historical data. Real-world results.

    EST. OPTIMIZATION +42% ROI Efficiency
    Start Backtest Now

    Sourced from 5+ Years of Exchange Data

    FAQs

    What is a coin ratio trigger % in a rebalance bot?

    It’s the amount of drift allowed between your target allocation and current holdings before the bot rebalances. A 2% trigger fires sooner than a 5% one.


    Not necessarily. Lower triggers mean more trades and fees, which can eat into returns even if the strategy feels more disciplined on paper.


    Yes. In a strong trending market, rebalancing can lock in profits too early compared to just holding through the full move, as shown in backtest comparisons.