

 Bitcoin
 Ethereum
 Solana
 TRON
 Zcash
 Hyperliquid
 Dogecoin
 Monero
 Chainlink
 Cardano
 Stellar
 Uniswap
 Sui
 Hedera
 Shiba Inu
 Bittensor
 Ripple USD
 Aster
 Polkadot
 World Liberty Financial
 Render
 Artificial Superintelligence Alliance

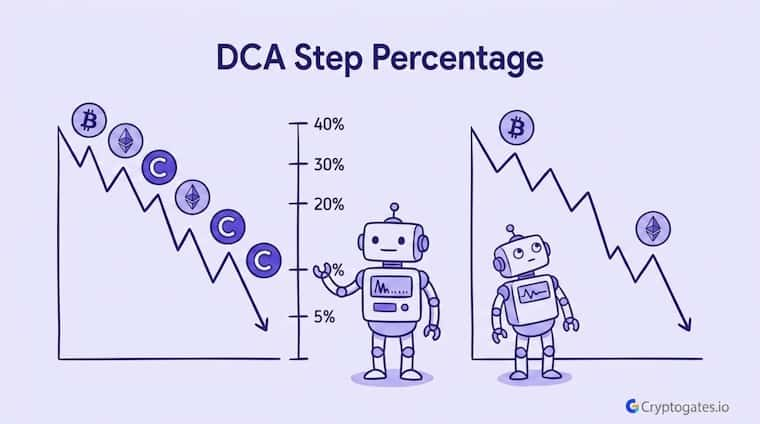
Ser, you spent twenty minutes picking your take profit percentage.
Maybe even longer arguing with yourself over order size.
But the step percentage field?
You probably just left it at whatever the default was.

Vanguard Research
Here’s the thing.
That one number decides how fast your bot spends your capital during a drop. Get the DCA step percentage wrong, and you either run out of dry powder halfway through a crash, or you miss the dip entirely because your orders never fire.
Most traders don’t realize this until they’re staring at a backtest, wondering why their strategy underperformed a simple buy and hold, since timing and discipline decide which side of the profit gap you land on.
- The Problem: Most traders set DCA step percentage without understanding it controls order timing, not profit potential.
- The Solution: Test different step percentages against real price action to see how entry spacing changes your outcome.
- The Incentive: A properly tuned step % can mean the difference between capturing a deep dip and running out of capital too early.
- The Risk: A step that's too tight or too wide can wreck your average entry price even if every other setting is perfect.
What DCA Step Percentage Actually Controls
Look, this part trips up a lot of beginners. DCA step percentage isn’t about how much you invest or how many orders you place.
It’s about spacing. Specifically, it’s the price drop required before your bot places its next order.
Battle-Test Your Strategy
Before the Market Does.
Eliminate guesswork with institutional-grade backtesting for DCA, Grid, and Rebalance bots. Real historical data. Real-world results.
Set it to 3%, and your bot will wait for the price to fall another 3% from the last fill before buying again.
Simple in theory.
But here’s what most guides miss: that spacing decision compounds across every order in your sequence, since dollar-cost averaging’s core math is just the average purchase price divided across each fill.
A tight step means your bot reacts fast to small dips. A wide step means it’s patient, holding back capital until the market gives it a real discount.
A CFA Institute Research Foundation review found that systematic, rules-based entry strategies reduced behavioral timing errors by a wide margin compared to discretionary entries, largely because they remove the guesswork around “when” to buy.
Think of step % like the gap between rungs on a ladder.
Tight rungs get you climbing fast, but you run out of ladder quick.
Wide rungs mean you’re covering more ground per step, but you might miss ground in between.
Why This Number Gets Ignored By Beginners
Honestly, it’s easy to see why.
Base order size and take-profit percentage feel more “important” because they directly touch your P&L math.
Step percentage feels technical, almost like a background setting.
Real Backtest Example
Strategy: DCA Bot (Tight Step)
Coin: TAO/USDT
Market Condition: Sharp reversal – 36% pump followed by a 17% round-trip loss
Objective: Test whether tight order spacing could keep pace with a fast-moving reversal
Key Result: A 1.5% step kept the bot firing on nearly every leg down — 139 of 140 sessions closed in profit, and the bot ended up +$1,677 even as spot holders were sitting on a 17% loss.
Expert Interpretation: This is what a tight step is built for — reactive, high-frequency entries in a market that’s moving fast in both directions. The tradeoff is capital gets deployed early, so it works best when the asset doesn’t keep sliding indefinitely.
TAO Pumped 36%, Then Bled Back to a 17% Loss — Our DCA Bot Still Banked +$1,677
But that’s exactly the mistake.
Your DCA Backtest Bot lets you run the same asset and capital across different step percentages side by side, and the P&L swings you’ll see between a 2% step and a 4% step can be significant.
It’s not a background setting.
It’s the setting.
Tighter Step % vs Wider Step %
Here’s where the real decision gets made.
A tighter step percentage, say 2%, means your bot reacts to almost every small wobble in price. Orders fill fast.
Capital gets deployed early.
That feels good when the dip is shallow and the price recovers quickly.
Stop Guessing.
Stress Test Your Edge.
The market doesn't care about your backtest. Our engine simulates 1,000+ "what-if" scenarios to ensure your strategy is built for survival.
Run Crypto Strategy Engine →But wait.
What happens when the drop keeps going?
A tight step burns through your DCA orders before the bottom even shows up. You’re left fully deployed, no dry powder, watching the price keep falling.
That’s the trap.
A wider step, something like 4% or 5%, forces patience.
Your bot waits for a real move before committing more capital. It gets you a better average entry price when corrections run deep.
The tradeoff is you might miss shallower dips entirely, especially on assets that chop sideways more than they trend down hard.
1. What Happens With A Tight Step
Fast fills.
Higher exposure earlier in the drawdown.
Less room is left if the correction extends further than expected.
This setup tends to work better in range-bound conditions where price doesn’t fall too far before bouncing back.
2. What Happens With A Wide Step
Slower fills.
More capital held in reserve.
Better average price if the market keeps sliding.
The risk here is missing entries completely if the price never drops enough to trigger your next order, leaving capital sitting idle.
| Step Type | Fill Speed | Best For |
|---|---|---|
| Tight (2%) | Fast | Shallow, choppy dips |
| Moderate (3%) | Balanced | Mixed volatility |
| Wide (4-5%) | Slow | Deep corrections |
Running this comparison manually across dozens of scenarios would eat up your whole weekend.
The DCA Backtest Bot handles it in minutes, letting you stack Strategy A, B, and C side by side against the same asset and timeframe, the same approach behind how a 2.5% step DCA bot turned a 45% ENA crash into $898 profit.

There's no single "good" number. It depends on the asset's typical volatility. Choppier coins usually need wider spacing to avoid overexposure early.
How Step Percentage Interacts With Volatility
A step percentage that works beautifully in one market condition can completely fall apart in another.
That’s the part most guides skip over. They treat step % like a fixed setting you pick once and forget.
But markets don’t stay the same.
An asset chopping sideways with 1-2% daily swings needs a different step than one prone to 10% single-day moves.
Set your step too tight on a volatile asset, and you’ll blow through your entire DCA order count during one sharp drop, leaving nothing left if the price keeps sliding.
Real Backtest Example
Strategy: DCA Bot (Wide Step, Deep Correction)
Coin: DOT/USDT
Market Condition: Extended downtrend — 56% decline over 7 months
Objective: See how a patient, wider-spaced DCA approach holds up across a correction with no quick bounce
Key Result: 79 of 80 sessions closed in profit. The bot returned +$380.99 while spot holders were down −$617 on the same capital — a $998 gap over the same window.
Expert Interpretation: This is the scenario wide steps are designed for. Holding capital back until price actually earns another entry meant the bot never ran dry, even seven months into a bleed that showed no sign of stopping.
DOT Crashed 56% in 7 Months — We DCA’d Into DOT’s Worst Downtrend
Zoom out for a second.
The NEAR test above shows this in action. A 3% step landed 21 sessions with 56 orders and a solid P&L outcome across a mix of choppy and trending price action.
A 2% step fired faster but caught fewer favorable entries, session 13 versus 21. More sessions, in this case, meant more chances to average into strength.
Reading Market Conditions Before Setting Step %
Realistically, you don’t need to predict the future here.
You just need a rough sense of how the asset has behaved recently.
Has it been ranging tight, or has it been swinging wide?
A quick look at recent price history tells you more than any fixed rule ever could.
Yes. A tighter step increases exposure earlier in a drawdown, while a wider step holds more capital back, directly changing how much risk you're carrying at any point in the sequence.
Fear and greed extremes, recent volatility spikes, whether the asset has been trending or chopping.
All of it feeds into whether you want a tighter or wider step. This is exactly why backtesting beats guessing.
You’re not asking “what step feels right“; you’re asking “what step actually performed better on this asset’s real price history.”
Finding Your Step Percentage Sweet Spot
There’s no universal DCA step percentage that works across every asset and every market condition.
What the NEAR comparison shows is pretty simple: a 3% step outperformed both the tighter 2% and wider 4% variants on this particular run, but that number isn’t a rule to copy blindly onto your next trade. It’s a starting point for your own testing.

"The traders who last aren't the ones chasing the perfect setting. They're the ones who test first and scale slowly once the data backs them up."
The smarter approach is treating step % as something you verify, not something you set once and forget.
Run your own parameters through the DCA Backtest Bot, watch how tight versus wide spacing changes your fill count and average entry, and adjust from there.
Confused about
market outlook?
Trading without a plan is just gambling. Our strategy architect analyzes your risk tolerance and capital to match you with a proven algorithmic framework.
FAQs
What is DCA step percentage?
It’s the price drop required before your bot places its next DCA order. A smaller number triggers faster, more frequent entries.
Should I use a tight or wide DCA step?
It depends on the asset’s volatility. Tighter steps suit shallow, choppy dips, while wider steps work better for deep corrections.
How do I find the right step percentage for my strategy?
Backtest a few options like 2%, 3%, and 4% on the same asset and timeframe, then compare fill speed, average entry price, and P&L.