 Bitcoin
  Ethereum
  Solana
  TRON
TRON  Zcash
Zcash  Hyperliquid
  Dogecoin
  Monero
  Chainlink
  Cardano
  Stellar
  Uniswap
  Sui
Sui  Hedera
  Bittensor
  Shiba Inu
  Ripple USD
  Polkadot
  Aster
Aster  World Liberty Financial
  Render
  Artificial Superintelligence Alliance
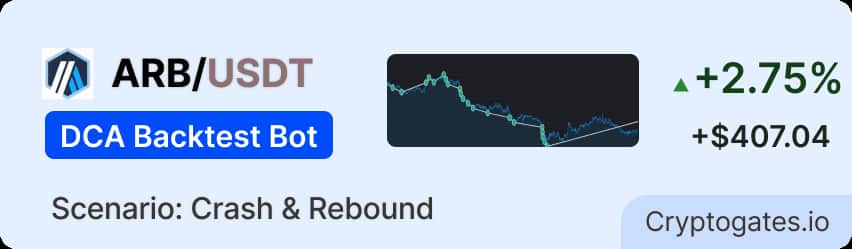
ARB was already bleeding. Then the tariff shock hit.
ARB opened the test on March 19, 2025 at $0.372, with the March token unlock still weighing on the market.
It drifted toward $0.40 first. Then the early-April tariff shock hit, and ARB flushed to roughly $0.25, about a third below the open.
A relief rally followed. By May 23, ARB closed at $0.3908, up 5.05% from where it started.
Anyone who held through the bottom ended green. Anyone who sold at $0.25 didn’t.
The question: If ARB can lose a third of its value within weeks, how should you space your DCA orders so you still have ammo at the bottom?
We ran three DCA steps (1%, 2.5% and 4%) across 65 days of real Binance 1-minute OHLCV data. Everything else stayed identical.
Strategy Parameters
How Each Setting Impacted Performance?
Parameter Impact Summary
| Parameter | Impact | The Logic (Why) |
|---|---|---|
| $200 Base Order | Controlled entry risk | 6.25% of capital |
| $200 DCA Orders | Linear averaging | Equal-size rungs |
| 2.5% DCA Step | Matched crash depth | Ladder covers ~38% |
| 15 Max Orders | Deep recovery buffer | Session 5 used all |
| 3% Take Profit | Fast cycle turnover | 27 TP hits |
| 0.075% Fee | Minimal drag | 2.7% of profit |
74 orders. $407.04 realized. $15.08 per completed cycle.
💰 The Real Yield
The dashboard shows 2.75% ROI. That divides $407.04 by $14,811.10, which counts every recycled dollar again.
The number that matters is profit on capital at risk: $407.04 ÷ $3,200 = 12.72% in 65 days. That’s roughly 5.87% per 30 days, or about 70% annualized.
Treat that as arithmetic, not a forecast. This window had a crash and a rebound, and calm markets produce far fewer triggers.
⚡ Capital Turnover
$14,811.10 ÷ $3,200 = 4.63x. The same capital cycled through the market nearly five times.
Per closed session, the average is $15.08 ($407.04 ÷ 27, excluding the open one). A single-order session netted $5.70 on $200.15 invested, a clean 2.85% after fees.
Most sessions used 1–3 orders. The crash session used all 16.
🛡️ The Fee Verdict
Fees took $11.10, or 2.73% of realized profit. Over 74 orders and 65 days, that’s lean. At 0.075% per order, fees weren’t the story here.
| Variant | DCA Step | TP % | Sessions | Orders | P&L USDT |
|---|---|---|---|---|---|
| A | 1% | 3% | 17 | 77 | $152.29 |
| B | 4% | 3% | 22 | 46 | $209.92 |
| C (Playbook) This Playbook | 2.5% | 3% | 27 | 74 | $407.04 |
Test A fired the most orders per session (4.5, versus 2.7 for C). It exhausted its ladder early and locked capital in fewer, longer cycles.
Test B went the other way: 2.1 orders per session and only 46 orders in total. It skipped the small dips that C turned into profit.
C won on P&L and on efficiency per session. But it’s the right fit for this crash depth, not a universal winner.
What the results are really telling you.
✅ what worked
Session 5 carried the playbook. It opened March 26, absorbed all 16 orders through the crash, and closed April 23 for +$91.13, about 22% of total profit. The 2.5% step spaced fills across a ~35% slide instead of burning them early.
Meanwhile, shallow bounce sessions (1–3 orders each) banked $5.70–$17.09 apiece. Fifteen rungs plus a 3% TP positioned the bot at the bottom and still collected on the way up.
⚠️What didn't work
Test A’s 1% step ran 77 orders but earned just $152.29 over 17 sessions. That’s $8.96 per session versus $15.08 for Test C. Fifteen rungs at 1% cover only ~15% of downside, so deep drops exhaust the ladder early.
The fix is a wider step, but Test B’s 4% shows the cost: 46 orders, 22 sessions, $209.92. Neither lost money. Both left profit on the table.
💡 The key insight
Your DCA step is a depth setting, not a speed setting.
Multiply step × max orders and you get the drop your ladder can absorb: ~15% for Test A, ~37.5% for Test C, ~60% for Test B. ARB fell roughly a third, so only the 2.5% ladder matched the move without paying for unused depth.
Match ladder depth to the expected drawdown, then let take profit do the harvesting. The optimal step isn’t a universal number. It’s the coin’s typical drawdown divided by your order count.
🚩 Watch out for - a potential red flag
The 90.19% max drawdown is session-level exposure, not account loss. But it’s real while it lasts.
Session 5 ran 28 days with all 16 orders filled, leaving zero ammo. A deeper crash would have left it stuck: no more buys, just waiting for a bounce. One session also finished the window still open.
Always keep the full $3,200 liquid before launching, and only run this if you can sit through a deep unrealized dip without closing manually.
🧭 When This Strategy Works Best
Ideal Conditions:
✔ Crash-and-recover cycles where drawdowns stay inside the ladder depth
✔ Choppy relief rallies with repeated 3%+ bounces
✔ Sideways ranges with steady oscillation
✔ Coins whose typical drawdown is under ~35%
🚫 When NOT To Use This Strategy
Avoid when:
❌ Sustained downtrends deeper than ~38% with no meaningful bounces
❌ Straight-line bull runs that never pull back 2.5%
❌ Flat, low-volatility markets where triggers don’t fire
❌ You can’t keep the full $3,200 liquid and uncommitted
📊 Expert Rating
Profitability: ⭐⭐⭐⭐☆
Risk Control: ⭐⭐⭐☆☆
Capital Efficiency: ⭐⭐⭐⭐☆
Beginner Friendly: ⭐⭐⭐⭐☆
Market Adaptability: ⭐⭐⭐☆☆
🏆 Overall Score
7.6 / 10: Strong Crash-Survival DCA Setup, Deep Pockets Required
✔ Quick Takeaways
- 27 of 28 sessions closed in profit, with the crash in the middle of the window
- 2.5% step earned $407.04, versus $152.29 (1%) and $209.92 (4%)
- Step × max orders sets your survivable drawdown: ~37.5% here
- Session 5 used all 16 orders and still closed at +$91.13, but with zero ammo to spare
- The 90.19% drawdown is in-session exposure, not total account loss
- Fee drag was 2.73% of profit across 74 orders
What did spot buy & hold actually return?
The platform’s benchmark uses $1,100. We normalized it to the bot’s $3,200 capital at risk for a fair comparison.
The opportunity cost of not running the bot: $245.33. That’s the gap between +$407.04 and +$161.71.
The hold also had to sit through a ~35% paper loss before the rebound. The bot turned that same crash into 27 closed cycles.
Before you run this playbook, check these off.
Use this as your go/no-go checklist before deploying this exact parameter set.
🧠 Market Suitability Matrix
| Market Condition | Rating | Strategic Notes |
|---|---|---|
| Sideways / Consolidating | ★★★★★ Ideal | Frequent small cycles; $5.70–$11.39 sessions repeat |
| High Volatility | ★★★★★ Ideal | Deep fills, fast TP exits: 27 hits in 65 days |
| Mildly Bearish / Slow Bleed | ★★★★☆ Acceptable | Longer cycles; ladder depth drains slowly |
| Mildly Bullish / Slow Climb | ★★★☆☆ Acceptable | Fewer dips, smaller P&L, idle capital |
| Strong Bull Run | ★★☆☆☆ Risky | High opportunity cost; 2.5% pullbacks rarely come |
| Strong Bear / Crash | ★★☆☆☆ Risky | Survived ~35% here; a deeper drop exhausts the ladder |
| Very Low Volatility | ★☆☆☆☆ Avoid | No triggers, deadweight capital |
How to tune this playbook for different scenarios.
Disclaimer: All data sourced from CryptoGates DCA Backtest Bot. Results are historical simulations using Binance 1-minute OHLCV data. Past backtest performance does not guarantee future live trading results. DYOR.
Battle-Test Your Strategy
Before the Market Does.
Eliminate guesswork with institutional-grade backtesting for DCA, Grid, and Rebalance bots. Real historical data. Real-world results.