

 Bitcoin
 Ethereum
 Solana
 TRON
 Hyperliquid
 Zcash
 Dogecoin
 Monero
 Chainlink
 Cardano
 Stellar
 Uniswap
 Sui
 Hedera
 Shiba Inu
 Bittensor
 Ripple USD
 Aster
 Polkadot
 World Liberty Financial
 Render
 Artificial Superintelligence Alliance

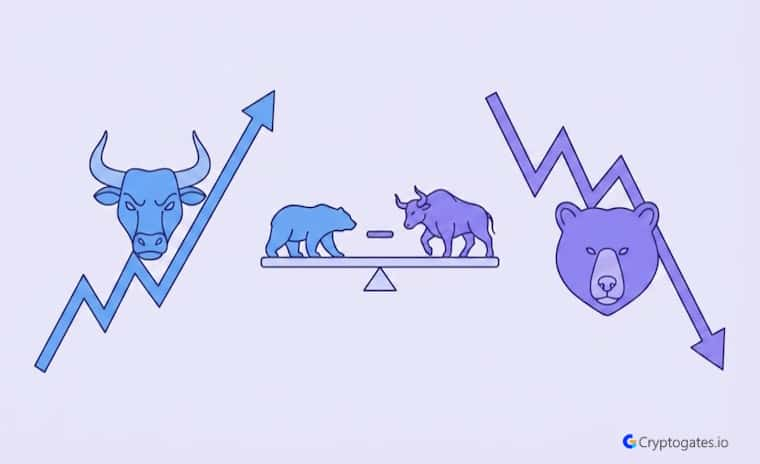
Be honest with yourself for a second.
You’ve probably run the same grid trading strategy on every single asset without ever asking if the market actually matches your settings.
That’s not your fault, though.
Most beginners think grid trading is a “set it and forget it” tool:
Plug in a range, walk away, and let the bot print money. Look, it’s not that simple. Grid works differently in a bull run than it does in a bear market chop, and completely differently again during a flat, boring sideways grind.
Here’s what actually matters:
Matching your grid to the regime in front of you, not the one you wish were happening.

OutrightCRM
- The Problem: Traders run one grid setup across bull, bear, and sideways markets, then wonder why it stops working the moment conditions shift.
- The Solution: Adjust range width, grid density, and capital exposure based on the actual market regime instead of a fixed template.
- The Incentive: A properly matched grid setup can turn boring, range-bound price action into consistent, fee-adjusted returns.
- The Risk: A grid built for the wrong regime can trap capital in a falling market or leave profits on the table during a breakout.
What Is Grid Trading?
Honestly, grid trading sounds more complicated than it is.
You set a price range, split it into levels, and place buy orders below the current price and sell orders above it.
When price swings through those levels, the bot buys low and sells high automatically.
No predictions. No staring at charts all day.
Here’s the interesting part, though. Grid trading isn’t trying to guess where the price goes next. It’s built entirely around the idea that price will oscillate, bounce, chop, whatever you want to call it, and that oscillation itself is the profit engine.
Think of it less like a directional bet and more like range trading on autopilot, tied to buy-low-sell-high logic and automated execution.
How Grid Orders Work
Every time price crosses a grid level, one order fills and a new one gets placed opposite it.
That’s the whole loop. It just keeps repeating as long as price stays inside your range.
Why Market Conditions Matter in Grid Trading
Wait, this is the part most beginners skip.
A grid that prints steady wins in a sideways market can absolutely wreck your capital allocation the moment that same asset starts trending hard.
Grid trading does not perform equally across every condition, and pretending otherwise is how accounts get cooked.
Market structure, volatility, and trend strength all decide whether your grid is working with the market or fighting it. A tight range in a strong trend basically means you’re guaranteed to get run over in one direction.
That’s not bad luck. That’s a mismatch between setup and regime.
Reading Volatility and Trend Strength
Range behavior tells you if price is respecting boundaries or breaking them. If support and resistance keep holding, you’re probably fine.
If price keeps making new highs or lows without returning, the grid is fighting a trend it can’t win.

It can, but only with wider ranges and lighter grid density. A tight, aggressive grid in a strong uptrend often gets left behind as price runs past the top of the range.
Best Grid Trading Strategy for Bull Markets
Bull markets feel like free money until your grid gets left in the dust.
Ngl,
This is where a lot of degens get overconfident. Grid can still work here, it’s just gonna need real adjustment instead of the default settings you copied from some YouTube video.
The smart move is leaning the range upward or widening it so a strong trend doesn’t just blow past your top sell order.
Watch for breakout risk and trend continuation, because upward drift can strand a tight grid fast.
Bull Market Grid Setup
Use wider ranges than you’d normally set.
Reduce grid density if price is trending hard, since too many tight levels just means more missed fills. Consider geometric spacing if the move is accelerating.
And honestly,
Capital preservation should matter more here than stacking aggressive orders.
Bull Market Risks
Price can run straight past your grid and stop triggering sells entirely. This thing can rip, and if it rips past your range, your bot just sits there doing nothing useful.
Overly tight grids underperform because the market simply doesn’t stay in range long enough to matter.
Best Use Case in Bull Markets
Mildly bullish, choppy uptrends with real pullbacks work best. Assets that consolidate before continuing higher give the grid something to actually chew on, instead of just watching from the sidelines.

Mark Douglas, Trading in the Zone
Best Grid Trading Strategy for Bear Markets
Look, bear markets are brutal for grid trading.
There’s no sugarcoating this one. If the range breaks to the downside, the bot just keeps buying into a falling knife, and that’s exactly the kind of setup that turns into a bagholder situation.
Downside pressure, drawdown risk, and capital lock-up are the three things you need to respect here.
This is where CT starts talking about getting rekt, and honestly, most of the time it’s because someone ran a bull-market grid setup during a bear leg.
Bear Market Grid Setup
Keep the range defensive.
Use smaller capital than you would in calmer conditions.
Prefer spot grid over futures grid here, since leverage in a falling market is a recipe for liquidation.
Widen your spacing and resist the urge to overtrade every small bounce.
Bear Market Risks
Continuous decline can trap capital for a long time. The bot may keep accumulating losing positions as price grinds lower.
Futures grids get especially dangerous here, because leverage turns a slow bleed into something that can wipe an account fast.
Common Belief:
A grid bot losing less than a spot holder during a crash still counts as a “win.”
What CryptoGates research found: In a backtest covering BNB’s 33% post-ATH collapse (from $1,294 to $864 over 79 days), the grid bot fired 171 trades and generated $163.94 in grid profit — yet total ROI still landed at −21.64%.
Grid profit and actual account performance are not the same number, and treating them as interchangeable is exactly the trap the article’s “bear market risk” section warns against: a range that breaks to the downside keeps the bot buying into a falling price, and no amount of fill activity fixes that.
Why it matters: This is the practical cost of running a bull- or sideways-tuned grid into a bear leg without defensive adjustments — trade count and gross profit can look active while the account still bleeds.
View Complete Playbook: https://cryptogates.io/playbooks/grid-bot-vs-a-33-bnb-crash-what-the-backtest-data-actually-shows/
Best Use Case in Bear Markets
Short relief bounces and deep, temporary support zones.
This setup really only makes sense for experienced traders who are actively monitoring, ready to pause the bot the moment structure breaks.
Sideways, range-bound markets. Price bounces between clear support and resistance without committing to a direction, which is exactly what a grid is built to capture.
Best Grid Trading Strategy for Sideways Markets
Here’s the thing everyone eventually figures out.
Sideways markets, the ones that bore directional traders half to death, are grid trading’s actual home turf. This is where the strategy is supposed to shine, and honestly, it’s not close.
Price repeatedly moves between support and resistance, creating one grid opportunity after another. This is where consistency peaks and where both spot and AI-driven setups tend to perform their best.
Grid Trading’s Sideways Advantage: A Real Test
Theory says grid trading thrives in sideways markets — but what does that actually look like in practice?
In one CryptoGates backtest, SOL drifted between $80 and $97 for 60 straight days, the kind of “boring” price action that frustrates directional traders.
The grid bot didn’t need direction. It fired 146 trades, banked $462.95 in net profit, and outperformed a simple buy-and-hold position by 10.88%. No trend calls, no predictions — just the range being respected and the grid doing what it’s built to do.
This is the practical version of the “sideways is grid’s home turf” argument: it’s not a theory, it’s a repeatable pattern once range width and grid count are matched to the market’s actual behavior.
View Complete Playbook: https://cryptogates.io/playbooks/sol-usdt-grid-bot-backtest-mar-apr-2026/
Sideways Market Grid Setup
Use a tight-to-moderate range with a balanced grid count.
Keep your focus on fee-adjusted profitability rather than raw trade count. Liquid pairs with a clear horizontal structure make this setup so much easier to run.
Sideways Market Advantages
Frequent order fills. Clear, readable price behavior.
A better risk-to-reward setup than anything you’d get chasing a trend. It’s just a stronger, steadier system overall for both spot and algorithmic approaches.
Best Use Case in Sideways Markets
Consolidation after a big move, assets stuck between obvious boundaries, and traders who’d rather collect small repeatable gains than chase the next moon candle.
How to Optimize a Grid Strategy
Honestly, grid trading isn’t a “turn it on and forget it” tool, no matter what some Telegram group tells you.
Optimization is where the real edge lives, and it comes down to range, spacing, capital allocation, and fee awareness working together instead of separately.
This is where backtesting earns its keep.
Before you commit real capital, running your setup through CryptoGates’ Grid Strategy Backtest Bot lets you see how your exact range and spacing would’ve performed across real historical conditions, not a guess dressed up as a plan.

Zaheer here. I'll say this every time someone asks me about grid settings: verify first, risk later, scale slowly. A backtest costs you nothing. A live mistake costs you real money.
Choosing the Right Price Range
Set your range around actual support and resistance, not a number that just felt right.
Avoid ranges that are too tight, since price breaks out fast, and avoid ranges that are too wide, since each grid captures too little to matter. The range should reflect what the market has actually been doing, not what you hope it does next.
Grid Count, Spacing and Capital Allocation
More grids mean more trades but smaller profit per trade.
Fewer grids mean bigger profit per trade but fewer chances to fill. Match your spacing to volatility, and honestly, don’t overcommit to one grid just because it feels active.
Keep position size aligned with your actual risk tolerance and reserve some cash for a sudden breakout or trend shift.
Content Table: Grid Setup by Market Type
| Market Condition | Range Width | Grid Density |
|---|---|---|
| Bull | Wide | Low |
| Bear | Defensive/Narrow | Low |
| Sideways | Tight-to-moderate | Balanced |
Fees and ROI
Here’s the issue nobody warns you about early enough.
Fees can quietly destroy an otherwise solid grid setup. Every fill has a cost, and if your grid spacing doesn’t comfortably clear that cost, you’re basically paying the exchange to lose small amounts over and over.
Always measure ROI net of fees, factoring in realized profit, unrealized loss, and true capital efficiency, not just the raw number of trades your bot executed.

Grid bots that ignore fee drag from overly narrow spacing are one of the most common reasons range-bound strategies underperform in practice, according to CoinCodeCap.
When Not to Use Grid (and Common Mistakes to Avoid)
Wait, here’s the thing that separates a disciplined trader from someone about to get cooked. Grid trading isn’t supposed to run on every market, every pair, every condition.
Trend-heavy markets and illiquid pairs are the two biggest red flags, and ignoring them is basically asking for a strategy failure.
Market Mismatches to Avoid
Strong one-directional trends can trap your bot on the wrong side of a move, fast.
Illiquid pairs create wide spreads and poor execution, where slippage and fees quietly eat whatever small profit the grid was supposed to capture.
And if support and resistance aren’t even visible on the chart, setting a range is just guessing with extra steps. Guessing isn’t a strategy, no matter how confident it feels.
Spot Grid vs Futures Grid
Spot grid is the safer, more forgiving option for most people. Futures grid adds leverage into the mix, which means liquidation risk becomes a real possibility instead of a theoretical one.
Futures setups demand stronger discipline and sharper market timing, so they’re not really a beginner’s tool.
Common Grid Trading Mistakes
Using one grid setup across every market condition. Setting too many grids in a fee-heavy environment. Ignoring trend breaks until it’s too late. Running futures grid with zero risk control.
Not updating settings as volatility shifts. Look, these five mistakes cover most of the losses people blame on “bad luck.“
Best Practices and the Market-Condition Playbook
Here’s the simple truth.
The best grid traders aren’t the ones with the fanciest bot. They’re the ones who adapt their settings instead of running the same formula on every chart.
Ngl,
That’s basically the entire difference between consistent grid profits and getting cooked during a trend change.

Andreas M. Antonopoulos
Interactive Checklist: Before You Launch a Grid
- Backtest the exact range and spacing first
- Start with smaller capital, scale up slowly
- Only use liquid pairs with clear structure
- Match the setup to bull, bear, or sideways conditions
- Track ROI net of fees, not gross trade count
Quick Playbook by Market Type
Bull market: wider, defensive, trend-aware settings that won’t get left behind.
Bear market: reduced exposure, smaller capital, capital protection first.
Sideways market: this is where you run your most active grid setup, full stop. The strategy that wins isn’t the most aggressive one.
It’s the one that fits the market instead of fighting it.
Bitsgap
Conclusion
Look, grid trading works best when the market is sideways.
That’s just the honest answer. But it can still be adapted for bull and bear conditions if you’re willing to adjust range, density, and capital instead of copying one template everywhere.
The traders who actually stay consistent are the ones who know when to widen a range, when to go defensive, and when to sit a trend out entirely.
If you want to see how your own settings would’ve performed instead of guessing, run them through the Grid Strategy Backtest Bot first.
Verify before you automate.
FAQs
Is grid trading profitable in a trending market?
It can struggle in strong one-directional trends since the bot may miss upside or keep buying into a decline. Wider ranges and lighter density help, but sideways conditions remain more reliable.
How much capital do I need to start grid trading?
There’s no fixed number. It depends on your grid density, spacing, and risk tolerance. Starting small and scaling slowly is the safer approach for most traders.
What's the difference between spot grid and futures grid?
Spot grid trades with owned assets and carries lower risk. Futures grid adds leverage, which increases both potential returns and liquidation risk, so it demands more discipline.