

 Bitcoin
 Ethereum
 Solana
 TRON
 Zcash
 Hyperliquid
 Dogecoin
 Monero
 Chainlink
 Cardano
 Stellar
 Uniswap
 Sui
 Hedera
 Shiba Inu
 Bittensor
 Ripple USD
 Aster
 Polkadot
 World Liberty Financial
 Render
 Artificial Superintelligence Alliance

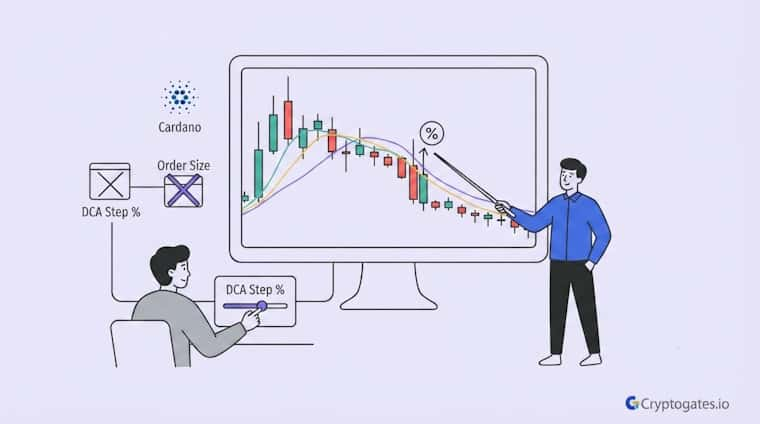
You set up a DCA bot, pick a coin, and walk away thinking the hard part is done. Then the price starts sliding
Not crashing. Just… bleeding. Slowly. Week after week. And that’s when most bots either survive or run out of ammo completely.
ADA gave us exactly that setup after its rally cooled off and rolled into a long, grinding correction with no sharp bottom in sight.
No panic wick. No V-shaped recovery. Just a steady bleed lower.

Binance Academy, Research Report
Here’s the part that surprised us.
The single biggest factor in whether the bot survived wasn’t order size. It wasn’t take profit targets either.
It came down to DCA step percentage, the spacing between each buy order that underpins any dollar-cost averaging strategy.
- The Problem: A slow, grinding correction can drain a DCA bot's order count long before the price actually bottoms out.
- The Solution: Testing DCA step percentage in isolation shows which spacing setup gives your bot the room to keep buying.
- The Incentive: Get this one input right and your bot survives longer stretches without needing a bigger bankroll.
- The Risk: Spacing that works in one market regime can fail badly in another, so nothing here should be copied blindly.
What Happened When ADA's Rally Turned Into a Slow Bleed
ADA had a strong run higher, according to CoinGecko’s Cardano price data. Then, like clockwork, it gave a chunk of that back.
Not all at once. Over weeks.
Here’s the thing about slow bleeds. They’re sneaky. A crash gets your attention right away. You know something’s wrong. A slow bleed just… keeps going.
Quietly.
Until you check your bot one day and realize it’s fully loaded on orders with the price still nowhere near recovery.
| Regime | What Happens to Price | What Happens to a DCA Bot |
|---|---|---|
| Sharp Crash | Fast drop, often followed by a bounce | Orders fill quickly, then price recovers fast |
| Slow Bleed | Gradual decline over weeks | Orders fill steadily, bankroll drains without a bottom in sight |
| Sideways Chop | Price oscillates in a range | Orders fill occasionally, bot stays flexible |
That’s exactly the kind of market ADA moved into after its highs, the same grinding pattern our TRX DCA bot backtest in a slow-bleed market was built to survive.
Lower highs, lower lows, small bounces that fail, repeat.
For a DCA bot, this is arguably the hardest environment there is. Not because the losses are dramatic.
Because they’re slow enough to keep triggering new buy orders long after a sharper crash would’ve already stopped.
1. The Correction After the Rally
ADA’s move down wasn’t violent.
It was patient, almost boring to watch on a chart. And that’s exactly what makes it a useful stress test.
A dramatic crash tells you how a bot handles shock. A slow bleed tells you how a bot handles attrition.
2. Why Slow Bleeds Punish DCA Bots Differently Than Crashes
A crash burns through your order ladder fast, sure, but it also tends to resolve fast. A slow bleed does the opposite.
It stretches the pain out.
Every small leg down triggers another order. And if your spacing is too tight, you can run dry on orders while the price is still, well, bleeding.

A sudden crash usually resolves fast, letting your bot recover its position. A slow bleed drags out over weeks, quietly using up your available orders before any bottom forms.
Look, this is where a lot of new bot builders get caught off guard.
They test their setup during a sharp dip, see it perform fine, and assume it’ll hold up anywhere.
It won’t. Not automatically.
The Single Variable That Mattered: DCA Step %
Here’s what we actually tested.
Same coin. Same base order. Same order size. Same take profit. Same number of max orders.
The only thing that changed across the three runs was DCA step percentage, tight, medium, and wide spacing.
That’s the whole point of isolating one variable. When everything else stays fixed, whatever shifts in the results has to come from that one input.
Real Backtest Example
Strategy: DCA Bot
Coin: TAO/USDT
Market Condition: High-volatility round-trip – a sharp 36% rally that fully reversed into a 17% net loss for spot holders
Objective: Test whether tight order spacing could keep the bot active through both the pump and the extended bleed that followed
Key Result: 139 of 140 sessions closed in profit, with the bot netting +$1,677 while spot holders were sitting on a 17% loss
Expert Interpretation: What stands out here isn’t the profit number – it’s that a 1.5% step was deliberately kept tight enough to catch every leg down as TAO round-tripped. That’s the opposite conclusion from a straightforward slow bleed, and it’s a useful contrast: spacing isn’t universally “tighter is worse” or “wider is safer.”
It depends on whether the drawdown is a sharp reversal with repeated legs, like TAO, or a grinding, directionless bleed, like ADA. The lesson holds either way — spacing has to be tested against the specific shape of the decline, not assumed from a rule of thumb.
Running this kind of single-variable test is exactly what the DCA Backtest Bot is built for.
You lock every other setting and only move the step percentage, so the result actually tells you something instead of just being noise.
1. Comparing Tight, Medium, and Wide Order Spacing
The tightest spacing filled orders fast.
Almost too fast.
It reacted to every small dip, which sounds good on paper until you realize it also means the bot burns through its order count way before the correction is anywhere close to done.
The medium spacing did better, but it still felt reactive.
It moved with the market’s smaller wiggles instead of waiting for meaningful pullbacks.
Research Insight
Isolating a single variable sounds simple in theory, but most bot builders skip it because it takes patience – running the same setup three or four times just to change one input feels slow when you could just launch and watch.
A separate CryptoGates backtest on TRX made the case for why that patience pays off. TRX spent 105 days in a slow post-ATH correction with no clean bounce, similar in shape to ADA’s grinding decline.
Every setting was held constant except the order-size multiplier, and the difference between the best and worst variant came out to $192 — a gap that only became visible because nothing else was changing at the same time. 27 of 28 sessions still closed in profit, but the size of that edge depended entirely on getting one parameter right.
The takeaway lines up with the ADA test directly: single-variable testing isn’t a formality. In a slow, directionless correction, it’s often the only way to see which input is actually doing the work.
The widest spacing behaved differently.
It waited.
It let smaller dips pass without reacting, which meant it still had orders left when the deeper part of the bleed actually showed up.
Ser, this isn’t really about picking a “winner” in some universal sense. It’s about matching your spacing to the kind of drawdown you’re actually likely to face.
2. Why Wider Spacing Helped the Bot Last Longer
Think of your order count like fuel in a tank.
Tight spacing burns fuel fast because it reacts to almost every dip. Wide spacing conserves fuel because it only reacts to bigger moves.
In a slow bleed, fuel efficiency matters more than reaction speed. You’re not trying to catch every small dip.
You’re trying to make sure you still have orders left when the real opportunity shows up, whenever that ends up being.
Stop Guessing.
Stress Test Your Edge.
The market doesn't care about your backtest. Our engine simulates 1,000+ "what-if" scenarios to ensure your strategy is built for survival.
Run Crypto Strategy Engine →What This Means For Your Own DCA Bot Setup
Okay, so what do you actually do with this.
You’re probably not trading ADA in this exact window with these exact settings. Fair point. But the underlying logic transfers.
1. Signs Your Step % Is Set Too Tight
If your backtest shows the bot maxing out its order count while price is still nowhere near a bottom, that’s your answer.
It’s not a coin problem. It’s a spacing problem.
Interactive Checklist
- Check how many total orders your bot has before going live
- Estimate how far a "slow bleed" could realistically stretch for your asset
- Test tight, medium, and wide spacing separately before picking one
- Watch whether your bot runs out of orders in backtests, not just whether it profits
- Re-test spacing whenever the coin's typical volatility profile shifts
Honestly, this is one of the biggest DCA mistakes crypto investors keep making.
They set spacing based on how the market moved last week, then get surprised when a slower, longer drawdown drains the bot early.
2. Signs Your Step % Is Set Too Tight
If your backtest shows the bot maxing out its order count while price is still nowhere near a bottom, that’s your answer.
It’s not a coin problem. It’s a spacing problem.
Honestly, this is one of the more common mistakes new builders make.
They set spacing based on how the market moved last week, then get surprised when a slower, longer drawdown drains the bot early.
3. How to Test Your Own Step % Before Going Live
Don’t guess.
Pull up a longer stretch of price history for whatever asset you’re working with, run a few spacing variants side by side, and watch how each one handles the slower stretches, not just the fast dips.
There's no single number that works everywhere. Wider spacing tends to conserve orders during slow declines, but the right setting depends on the asset's typical volatility and how long a drawdown might last.
The overlooked factor here is time.
A backtest window that’s too short won’t show you how spacing behaves during an extended grind, and that’s exactly the scenario where spacing matters most.
Test Your Setup Before the Market Tests It For You
ADA’s slow bleed made one thing pretty clear.
Step percentage, not order size, decided whether the bot had ammo left when it actually needed it.
That’s not a universal rule for every coin or every market condition, but it’s exactly the kind of thing worth checking before you risk real capital.
Run your own parameters through the DCA Strategy Backtest Bot and see how your setup holds up across different kinds of drawdowns, not just the ones you expect.
Battle-Test Your Strategy
Before the Market Does.
Eliminate guesswork with institutional-grade backtesting for DCA, Grid, and Rebalance bots. Real historical data. Real-world results.
FAQs
Does a wider DCA step always mean lower risk?
Not always. Wider spacing conserves orders during slow declines, but it can also mean missing smaller dips entirely. It depends on the market condition you’re preparing for.
How is DCA step % different from order size when it comes to bot survival?
Step % controls how far price must move before the next order fires. Order size controls how much capital each order uses. Spacing affects how long your bot lasts, not just how big each trade is.
Can DCA step % findings from one coin apply to another?
Not directly. Different coins have different volatility patterns, so a spacing setting that works well for one asset may need adjusting for another.