 Bitcoin
  Ethereum
  Solana
  TRON
TRON  Zcash
Zcash  Hyperliquid
  Dogecoin
  Monero
  Chainlink
  Cardano
  Stellar
  Uniswap
  Sui
Sui  Hedera
  Bittensor
  Shiba Inu
  Ripple USD
  Polkadot
  Aster
Aster  World Liberty Financial
  Render
  Artificial Superintelligence Alliance
Two shocks, 49 days apart. ARB never got a clean shot at recovery.
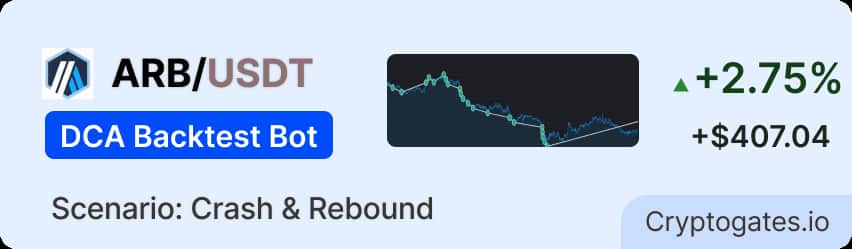
ARB entered the test window at $0.6924 on January 20, 2025. Nothing unusual yet – just another altcoin riding the tail end of a strong January.
By March 10, it closed at $0.3203. Down 53.7%, with no real bounce back to show for it.
Two events defined the middle of that window. Early February brought a broad market selloff tied to new U.S. tariff announcements on Canada, Mexico, and China – the kind of macro shock that hits altcoins hardest.
Three weeks later, a major crypto exchange suffered the largest hack in the industry’s history, draining liquidity and confidence from the market at the worst possible moment for anyone mid-drawdown.
ARB caught both.
The question we wanted answered: can a DCA bot with a wide step and patient take-profit survive two back-to-back shocks – or does compounding fear just compound the loss?
We ran this backtest on real Binance 1-minute OHLCV data across the full window to find out.
Strategy Parameters
How Each Setting Impacted Performance?
Parameter Impact Summary
| Parameter | Impact | The Logic (Why) |
|---|---|---|
| $250 Base Order | Moderate initial exposure | Balanced entry sizing |
| 3% DCA Step | Slower order stacking | Skips minor noise |
| 15 Max DCA Orders | Deep but insufficient buffer | Crash exceeded depth |
| 1.1x Size Multiplier | Larger late-stage orders | Compounds losses in freefall |
| 3% Take Profit | Fast exits in calm periods | Missed in the crash leg |
27 trades. 5 winning sessions. 1 session still bleeding $2,825.90.
The Math That Matters
💰 The Bottom Line:
On the strategy’s full deployable capital of $8,193.12, this backtest produced a -33.45% effective yield. The bot’s own ROI figure of -22.82% is calculated against total invested ($12,009.18), which is the more relevant number here since that’s what actually left the wallet.
Annualizing a 49-day, -22.82% result isn’t meaningful – this was a single non-repeating double-shock event, not a repeatable monthly cycle, so treat any annualized figure as illustrative at best, not a forecast.
⚡ Efficiency or Exposure:
Five sessions closed clean and fast – combined they made $85.80 on $3,015.01 deployed, a small but real positive edge while the market was still calm.
The sixth session tells the opposite story: it deployed $8,994.17, maxed out all 15 DCA orders plus the base order, and is still sitting open at -$2,825.90. That single session accounts for every dollar of loss in this backtest.
🛡️ The Fee Advantage:
Fees were never the problem. $9.00 total on $12,009.18 invested across 27 orders is 0.075% – a rounding error next to a $2,740 loss. This result was decided entirely by price action during the double shock, not by trading costs.
| Variant | Base/DCA | Step | Max Orders | TP % | Sessions | Orders | P&L USDT |
|---|---|---|---|---|---|---|---|
| A (Conservative) | 400 / 400 | 5% | 9 | 5% | 11 | 111 | -$1,437.16 |
| B (Aggressive) | 200 / 200 | 1.5% | 19 | 2% | 105 | 9 | -$1,402.82 |
| C (Optimized) This Playbook | 250 / 250 | 3% | 15 | 3% | 5 | 27 | -$2,740.10 |
All three variants lost money – this window was hostile to every DCA configuration tested.
Test A’s wide 5% step meant it entered once and never got a second session; it stayed pinned in that single losing position for the whole window.
Test B cycled through 10 sessions on a tight 1.5% step and 2% TP, capturing more small wins along the way, which kept its total loss smaller despite far more capital turnover.
Test C’s 1.1x size multiplier compounded order sizes as price fell, which pushed more capital into the crash and produced the largest dollar loss of the three – the trade-off for deeper averaging depth is bigger exposure when the depth still isn’t enough.
What the results are really telling you.
✅ what worked
Sessions 1 through 5 (Jan 20–24) closed clean, combining for +$85.80 on $3,015.01 deployed – all before the tariff shock hit.
The 3% step and 3% TP were well-matched to ARB’s pre-crash chop, cycling capital fast: Session 4 alone turned $1,161.12 into a $33.04 win in under 35 hours.
The bot did exactly what it’s built for in range-bound conditions.
⚠️What didn't work
Session 6 (Jan 24–Mar 10) is the entire story. It opened just before the tariff selloff, absorbed the Bybit hack three weeks later, and maxed out all 15 DCA orders plus base – $8,994.17 deployed – chasing a price that fell from ~$0.65 to $0.32 without a real bounce.
It’s still open at -$2,825.90. The fix would be more order depth or a wider step, but either means holding even more idle capital in reserve for a shock this size.
💡 The key insight
DCA bots harvest oscillation – they don’t survive one-directional crashes; they just average the damage down.
This setup’s 1.1x multiplier and 15-order depth were built for normal volatility, not a compounding double-shock event that erased over half of ARB’s value in under seven weeks.
The takeaway: max DCA orders should be sized to your asset’s worst historical drawdown, not its typical one. A 15-order buffer covers a 30–35% dip comfortably.
It doesn’t cover 54%. If you’re running a coin with real crash-tail risk, either widen the step meaningfully or accept that some windows will simply exceed your depth.
🚩 Watch out for - a potential red flag
The 75.13% max drawdown is session-level unrealized exposure, not a total account wipeout – but it’s still real money sitting underwater while the bot waits for a bounce that, in this window, never fully came.
Session 6 alone required $8,994.17 in available capital, and that money was locked for over six weeks with no exit. Before running this setup on a volatile low-cap like ARB, make sure your full $8,193.12+ capital allocation can sit idle and uncommitted for extended periods without needing it elsewhere.
🧭 When This Strategy Works Best
Ideal Conditions:
✔ Sideways or mildly choppy markets
✔ Volatility without a sustained directional trend
✔ Recoverable dips of 20–35% from entry
✔ Traders who can leave full capital locked for weeks
🚫 When NOT To Use This Strategy
Avoid when:
❌ Confirmed macro-driven crash conditions (tariff shocks, exchange hacks, liquidity crunches)
❌ Assets with a history of 50%+ drawdowns in short windows
❌ You can’t keep $8,193.12+ fully liquid for 6+ weeks
❌ You need the capital available for other trades mid-drawdown
📊 Expert Rating
Profitability: ⭐⭐☆☆☆
Risk Control: ⭐⭐☆☆☆
Capital Efficiency:⭐⭐☆☆☆
Beginner Friendly: ⭐⭐☆☆☆
Market Adaptability: ⭐⭐⭐☆☆
🏆 Overall Score
2.8 / 10 — Poor Absolute Return, Meaningful Loss Mitigation
This is a losing backtest. Test C lost $2,740.10 in a market that lost far more on a proportional basis (-53.74% for buy-and-hold vs -22.82% for the bot). That gap is real value.
✔ Quick Takeaways
- All three tested variants (A, B, C) lost money in this window – this wasn’t a parameter problem, it was a regime problem
- 5 of 6 sessions closed profitably before the crash hit; the 6th absorbed both shocks and is still open
- The 1.1x DCA multiplier deepened the loss by pouring larger orders into a falling price
- 75.13% max drawdown is session-level exposure, not total account loss
- Fees were negligible: $9.00 total against a $2,740.10 loss
- On equal capital, buy-and-hold would have lost ~$6,454 – the bot lost $3,713.83 less
What did spot buy & hold actually return?
The report’s own Buy & Hold figures use $1,100 in capital versus the bot’s $12,009.18 – not a fair comparison. Normalizing Buy & Hold to the bot’s capital base gives a real read on opportunity cost.
On equal capital, buy-and-hold would have lost approximately $6,453.93 through this window – the bot lost $3,713.83 less. Neither approach made money.
But the bot’s DCA structure meaningfully cushioned the blow of a genuine double-shock crash, cutting the loss percentage nearly in half compared to simply holding through it.
Before you run this playbook, check these off.
Use this as your go/no-go checklist before deploying this exact parameter set.
🧠 Market Suitability Matrix
| Market Condition | Rating | Strategic Notes |
|---|---|---|
| Sideways / Consolidating | ★★★★★ Excellent | Sessions 1–5 confirm fast, clean cycling |
| High Volatility (range-bound) | ★★★★☆ Good | Captures swings without directional risk |
| Mildly Bearish / Slow Bleed | ★★★☆☆ Moderate | Survivable with wider step and patience |
| Mildly Bullish / Slow Climb | ★★★☆☆ Moderate | Fewer triggers, lower P&L upside |
| Strongly Bullish / Fast Uptrend | ★★☆☆☆ Risky | Capital sits idle, high opportunity cost |
| Strongly Bearish / Crash (Double Shock) | ★☆☆☆☆ Poor | This backtest: -22.82% ROI, session still open |
| Very Low Volatility (flat) | ★☆☆☆☆ Poor | No triggers, capital deadweight |
How to tune this playbook for different scenarios.
Disclaimer: All data sourced from CryptoGates DCA Backtest Bot. Results are historical simulations using Binance 1-minute OHLCV data. Past backtest performance does not guarantee future live trading results. DYOR.
Battle-Test Your Strategy
Before the Market Does.
Eliminate guesswork with institutional-grade backtesting for DCA, Grid, and Rebalance bots. Real historical data. Real-world results.